Set up inventory
Create the products you buy or make, define where they are stored, and configure the rules that receiving, production, counting and sales use.
Before you create products
Flexitill uses one Product record for purchased goods, recipe ingredients, prepared stock and items sold directly. Decide the Product's base stock unit first: every receipt, count, recipe and stock movement is ultimately converted to that unit.
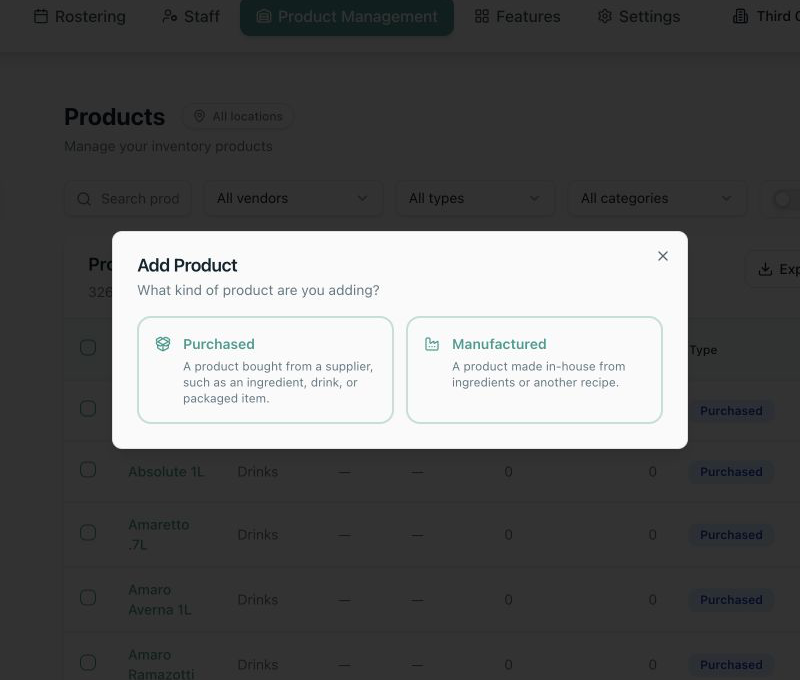
Purchased
Stock comes from a Supplier through a Delivery or Purchase Order receipt.
Manufactured
Stock is produced from a Recipe. Create it through the Recipe workflow or attach a Recipe to an eligible manufactured Product.
Quantity tracking
Use when batches and expiry dates do not need to remain identifiable.
No inventory tracking
Use only for a purchased non-stock ingredient or charge whose quantity must never appear in counts or stock movements.
Lot + Expiry tracking
Use when each received or produced batch must keep its own lot code, expiry and trace history.
Create a purchased product
Where to find it·Inventory → Products
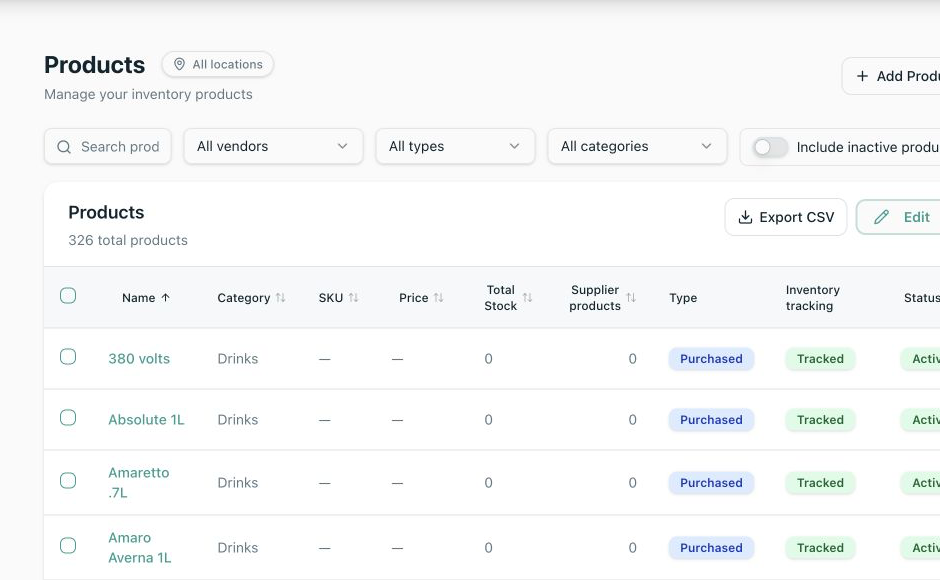
- 1Select the location you are configuring, choose Add Product, then choose Purchased.
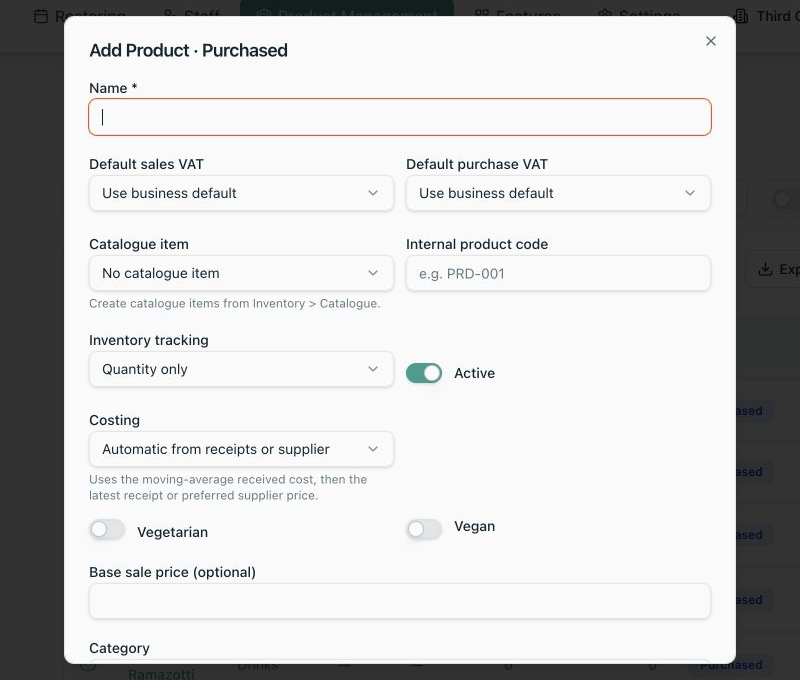
- 2Enter a unique Product name and, if used internally, an SKU or code. You may also link a shared Catalogue identity.
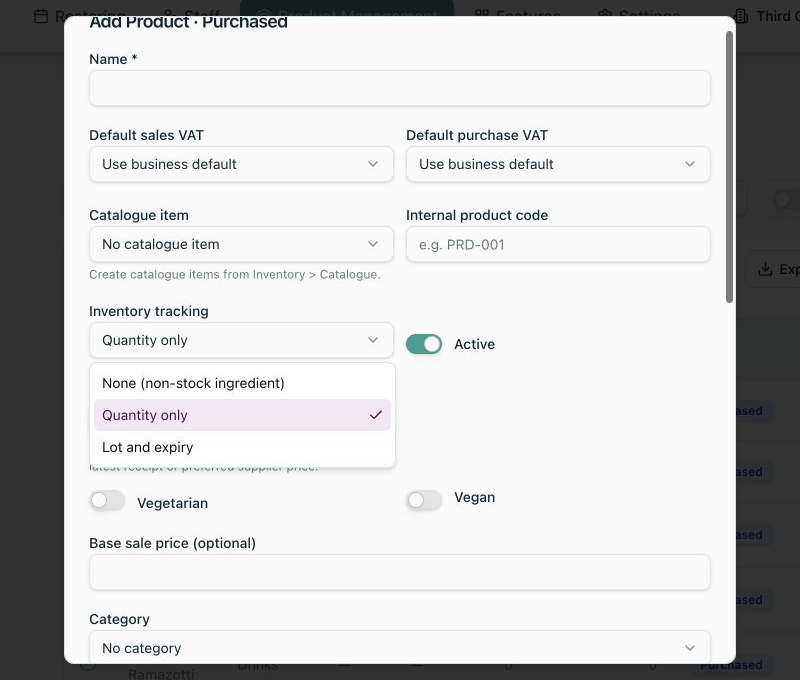
- 3Choose None, Quantity only or Lot and expiry tracking. Use None only when this purchased Product must not take part in stock operations.
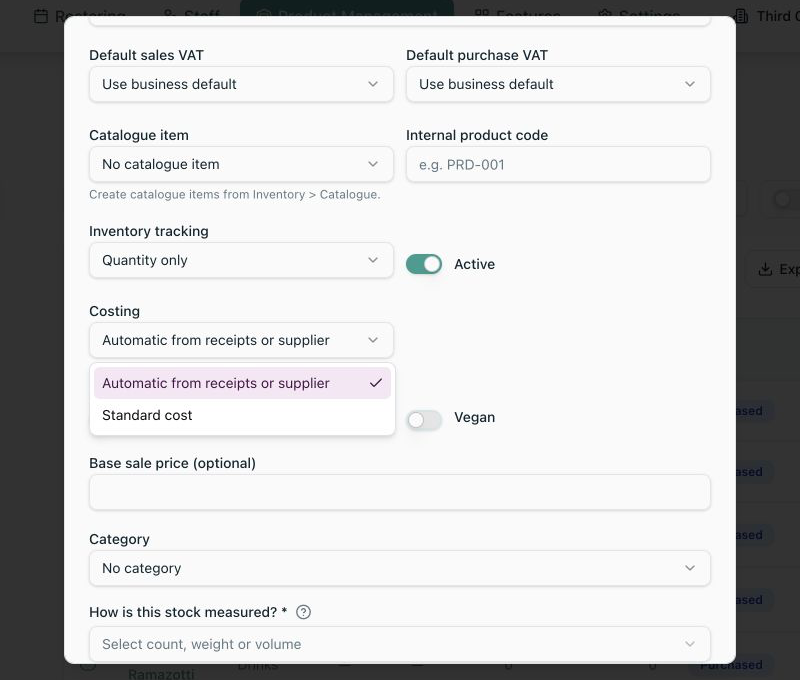
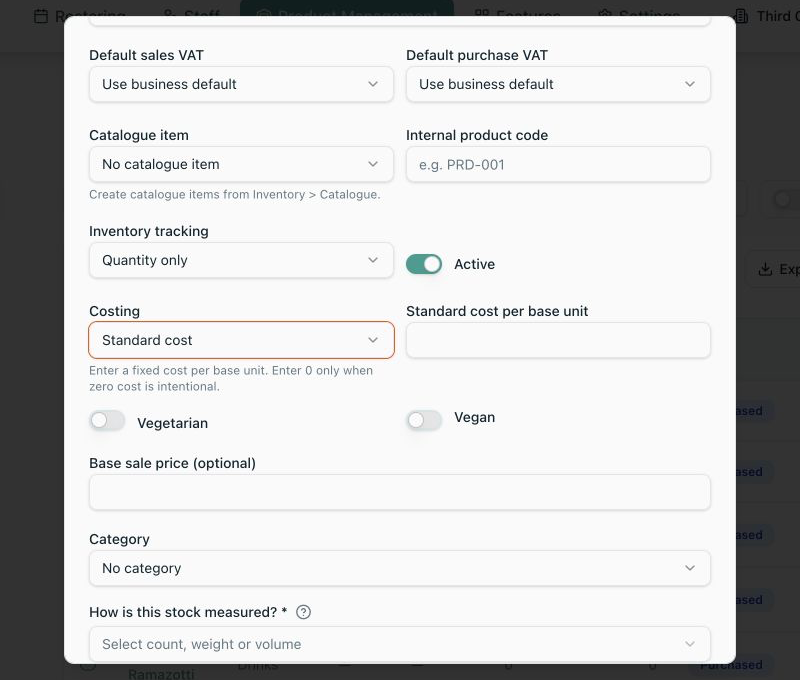
- 4Choose Automatic costing to use receipt and preferred-supplier data, or Standard cost to set a fixed cost per base unit.
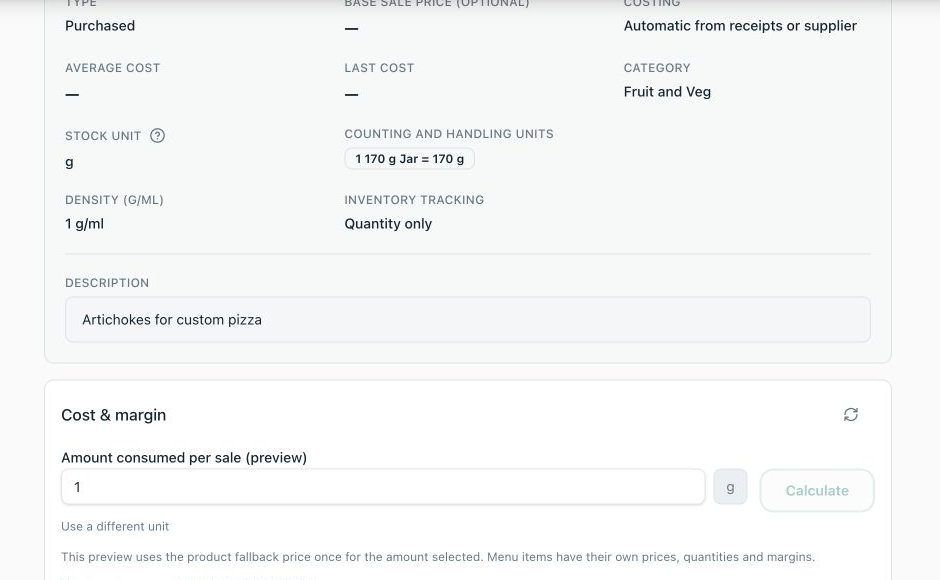
- 5Choose the base stock measurement: each, g or ml. Where recipes or packs cross mass and volume, enter density in grams per millilitre.
- 6Set default sales and purchase VAT, Category, optional base sale price, description, shelf life, storage notes, dietary flags and active status as required.
- 7Upload a Product image when useful. It becomes the default image for linked Menu Items unless the Menu Item supplies its own image.
- 8For the selected location, choose a default Storage Area. This is the suggested destination for future movements; it does not move existing stock.
- 9Optionally add the Product to one saved Stock Count List and add reusable counting/handling units such as case, bottle or bag with their measured contents.
- 10Save, then open the Product to finish Supplier Products, stock controls, Variants or substitutions.
Choose inventory tracking and costing
Inventory tracking
None (non-stock ingredient)
The Product can be referenced where the system allows it, but it has no on-hand balance and is excluded from inventory lists, Stock Counts and stock movements. This option is available only to purchased Products.
Quantity only
Receipts, sales, production, counts and losses change one quantity without retaining individual batch identities.
Lot and expiry
Every batch keeps a lot code, expiry and trace history. Use it where recall, shelf-life or batch-level issue order matters.
Costing
Read Understand and manage product costs for the full fallback order, weighted-average calculations, supplier-pack examples, standard-cost tradeoffs and manufactured-product differences.
Automatic from receipts or supplier
Uses the stored moving-average received cost. Only if that is missing does it use the last received cost; only if both are missing does it use the active preferred Supplier Product price. These sources are not averaged together.
Standard cost
Uses the fixed amount you enter for one base unit. Enter zero only when a zero cost is deliberate; otherwise the field must contain a valid cost.
Create a manufactured product
Where to find it·Inventory → Products → Add Product → Manufactured
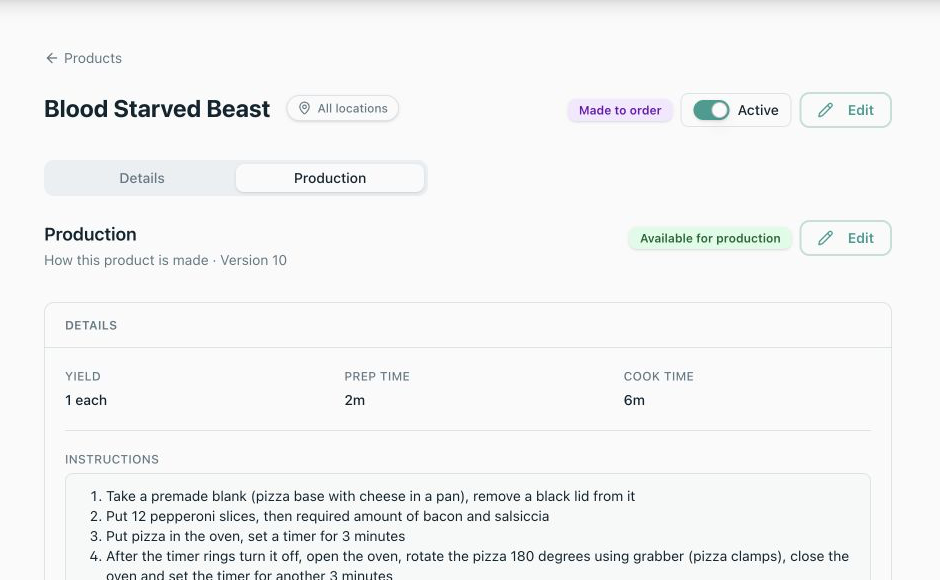
A manufactured Product is the stock or sale identity for something made in-house. Its Production tab is the active Recipe that explains how it is made, what it consumes, its yield and its production cost.
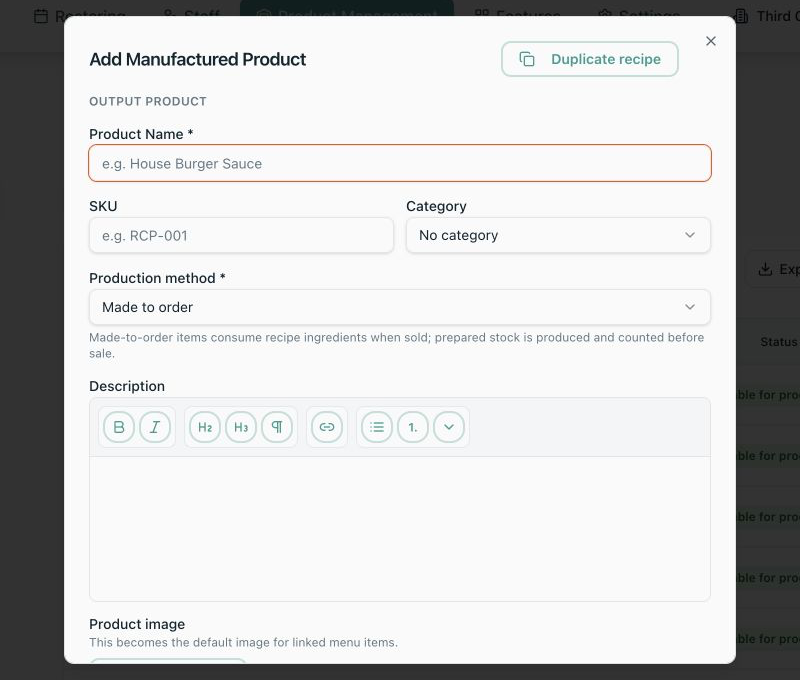
- 1Choose Manufactured, then either create a new output Product or attach the Recipe to an eligible existing manufactured Product that does not already have a production Recipe.
- 2Enter the Product name, SKU and Category. Choose Made to order when ingredients should be consumed as the item is sold, or Prepared stock when batches are produced into inventory before sale.
- 3Add the Product description and image. Product descriptions belong to the Product; put step-by-step preparation instructions in the Recipe.
- 4Set the Recipe yield quantity and unit. The yield unit also becomes the manufactured Product's base stock unit.
- 5Enter preparation and cooking time, instructions and ingredients. Each ingredient can use its base unit, a compatible global Unit or an appropriate Product counting/handling unit.
- 6Leave Active enabled only when the production Recipe is ready for use, then create the Product and review its Production tab.
Maintain product details and stock controls
Where to find it·Inventory → Products → choose a Product
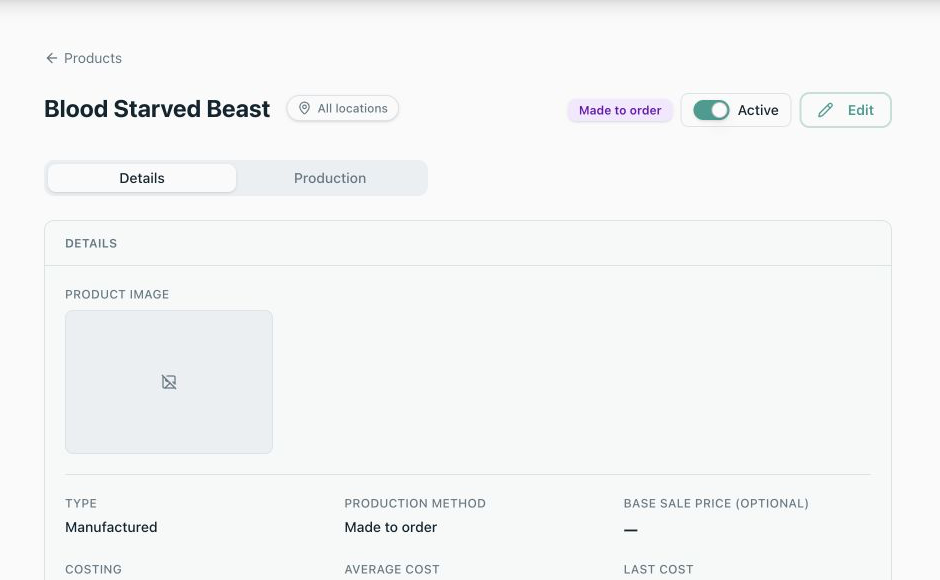
- 1Edit the Product's identity, Category, SKU, price, VAT defaults, costing, base unit, tracking mode, description, image, shelf life, dietary details and allergens, then save.
- 2If the Product is Manufactured, choose Made to order or Prepared stock and use the Production tab to maintain its Recipe. An active manufactured Product requires an active production Recipe.
- 3Select a location before editing its default Storage Area or issue policy.
- 4Choose Highest Quantity to consume from the fullest balance, Configured Priority to follow the Product's area priority, FIFO to use oldest stock first, or FEFO to use the earliest expiry first. FEFO is available for lot-tracked stock.
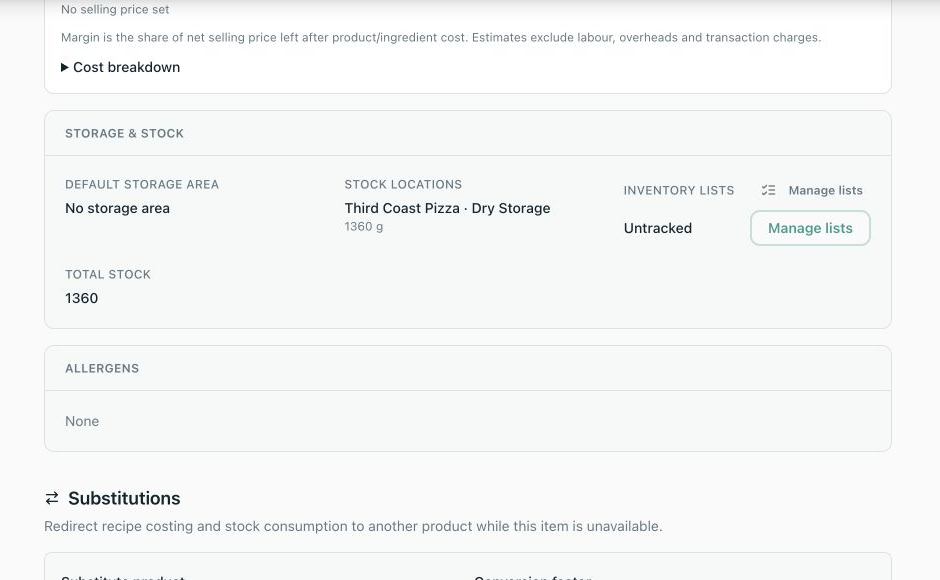
- 5Review on hand, committed and available quantities and the balance held in each Storage Area.
- 6Remove an obsolete area balance only when it is empty and is not the Product's default balance.
Add counting and handling units
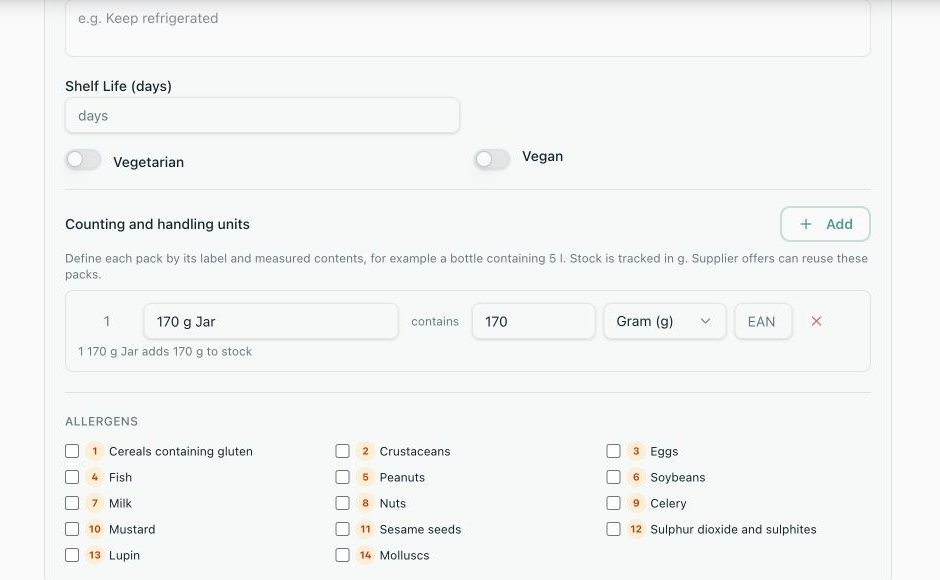
Product units make everyday entry practical without changing the stock ledger's base unit. For example, a 750 ml bottle can be counted as bottles while the ledger remains in millilitres.
- 1Open the Product, choose Edit and find Counting and handling units.
- 2Add a precise label such as 750 ml Bottle, Case of 24 or 10 kg Bag.
- 3Enter the measured contents and choose a compatible Unit. Flexitill converts that measurement into the Product's each, g or ml base stock automatically; density enables valid g-to-ml or ml-to-g conversions.
- 4Add an EAN when the pack is scanned and choose its scope if the Product uses Variants.
- 5Save the Product. The unit can now be selected in Recipe/Menu quantity controls, Stock Count List preferences, ad-hoc counts and Supplier Products where the Variant scope matches.
- 6If the conversion belongs only to one supplier's pack, configure it as a Supplier Product conversion instead of a Product unit.
- 7When a pack's contents or Variant scope is locked because the pack is already used, choose Add a different pack size instead of changing history represented by the existing pack.
Review product cost, profit and margin
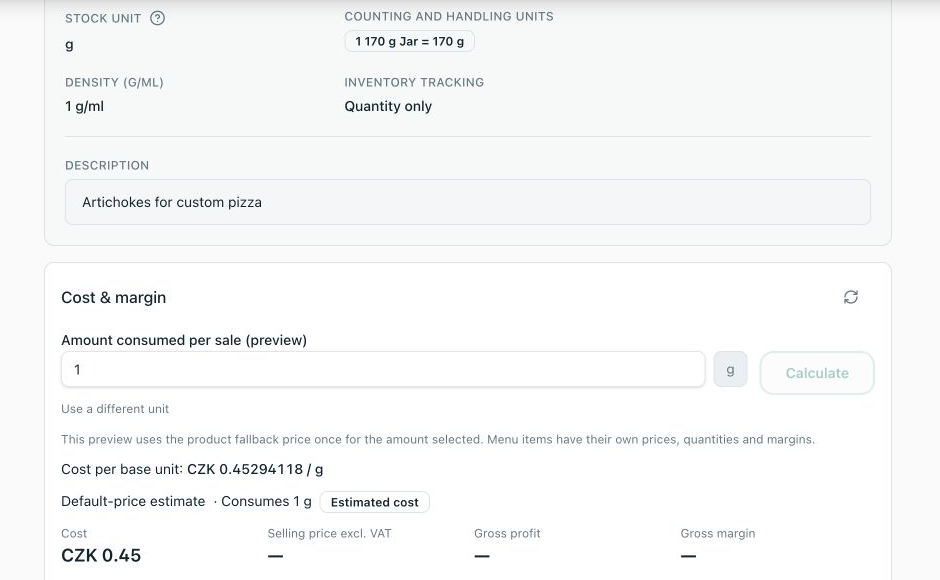
Where to find it·Inventory → Products → choose a Product → Cost & margin
- 1Review the cost per base unit and expand Cost breakdown to see whether it comes from receipts, a preferred Supplier Product, a standard cost or a production Recipe.
- 2Enter the quantity consumed by one sale. Choose a different compatible Unit or Variant when the sale uses a Product pack or one independently stocked Variant, then calculate.
- 3Compare estimated cost with the net selling price, gross profit and gross margin. Set a base sale price when this Product needs a fallback estimate.
- 4Follow every incomplete-cost warning to the Product or ingredient that is missing a receipt, preferred supplier price, standard cost or complete Recipe cost.
- 5Use the preview for a Product-level sense check. Menu Items keep their own sale price, quantity and margin, and the estimate excludes labour, overheads and transaction charges.
Trace lot-tracked stock
Where to find it·Inventory → Products → choose a lot-tracked Product
- 1Select the relevant location and open the lot list.
- 2Use status and expiry information to identify the batch, then open its trace.
- 3Review the original Supplier receipts or production runs, Storage Area movements, customer-order allocations and reversals.
- 4Correct the source transaction where possible: correct or void a Delivery, void a Write-off, or perform a fresh Stock Count. Do not edit unrelated stock to hide an audit discrepancy.
Understand product variants
A Product Variant is a separately identifiable and independently stocked form of one parent Product. It keeps the shared Product meaning, but can have its own SKU and attributes such as size, colour, volume or packaging. Receiving, Storage Area balances, lots, counts, Write-offs, sales and stock movements can all retain the Variant identity.
Use a Variant — merchandise sizes
Logo T-shirt is the Product; Size: S, M and L are Variants. Each size has its own SKU and balance, so receiving ten Medium shirts does not add ten Large shirts.
Use a Variant — separately sold formats
Sparkling Water is the Product; Volume: 330 ml can and 750 ml bottle are Variants when each format is bought, counted and sold as a distinct SKU.
Do not use a Variant — supplier case sizes
A case of 12 and a case of 24 containing the same 330 ml can are normally two Supplier Products linked to the same 330 ml Variant. The outer case changes ordering, not the stock identity inside it.
Do not use a Variant — interchangeable ingredient packs
A 10 kg and 25 kg flour bag are normally Supplier Products for one Flour Product when both become the same gram-based ingredient stock pool after receiving.
Create separate Products, not Variants, when the forms have materially different allergens, base units, Recipe roles, reporting Categories or operational meaning. Variant attributes are identifiers; they do not provide separate Product-level allergen or category configuration.
Create and connect product variants
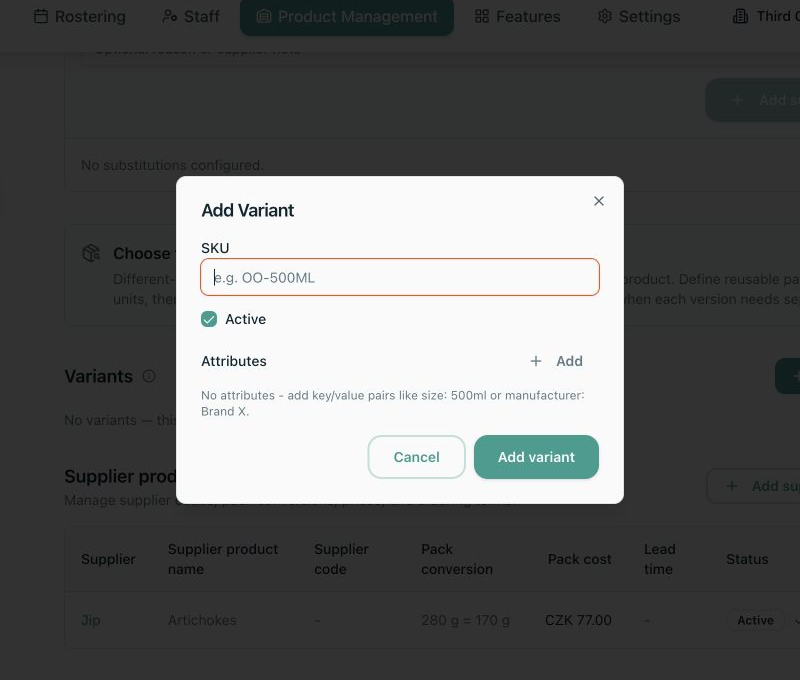
- 1Open the Product's Variants section and choose Add Variant.
- 2Enter a unique SKU when the Variant is scanned, purchased or sold independently.
- 3Add clear key/value attributes such as Size: Medium and Colour: Black, or Volume: 330 ml and Package: Can. Use consistent keys across sibling Variants so staff can compare them.
- 4Leave Active enabled and save.
- 5Link each exact supplier catalogue line to the Variant it supplies. If the supplier line can replenish the shared Product pool, leave Variant blank instead.
- 6Use Variant-scoped Product counting units when the handling pack applies only to that Variant.
- 7Configure Menu Item Variants, Components or Modifier options to consume the correct Product Variant where the sale choice must reduce that exact balance.
- 8Include the Variant in Stock Count Lists and verify it appears as its own count row and Storage Area balance.
How variants behave in stock workflows
Purchasing and receiving
A Supplier Product or PO line can target one Variant. Posting the receipt increases that Variant's balance in the chosen Storage Area.
Counting and losses
Count snapshots and Write-offs preserve the Variant, area and lot identity so one Variant can be reconciled without altering its siblings.
Recipes
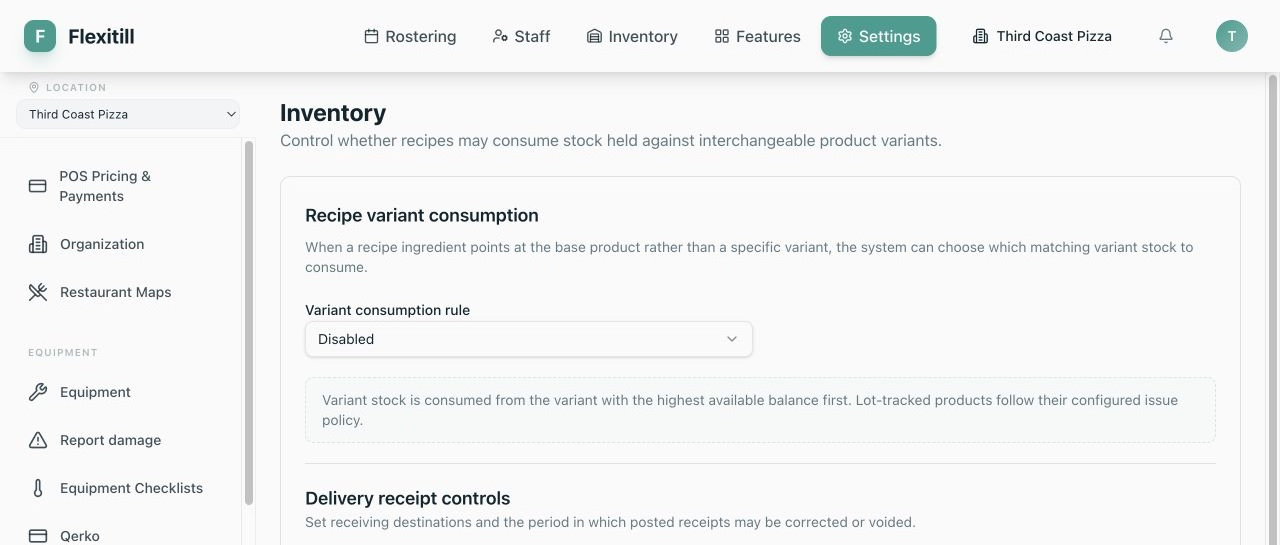
A Recipe ingredient can target a specific Variant. If it targets the base Product, Settings → Inventory can either disable automatic Variant use or consume Variant stock first from the highest available balance.
Menus and sales
A customer-facing Menu Item Variant is a sales choice; it can be mapped to the Product Variant that should actually be deducted. The two records are related but are not the same thing.
Configure a substitute product
A substitution redirects Recipe costing and stock consumption when the original Product is unavailable. Purchase Orders also surface active substitutions for unavailable Products.
- 1Open the Product's Substitutions section and choose the replacement Product.
- 2Enter the conversion factor. For example, use 2 when one base unit of the original requires two base units of the substitute.
- 3Set optional start and end dates and add a note explaining the operational decision.
- 4Save and check whether the substitution is In force, Scheduled or Inactive.
- 5Deactivate or delete the substitution when normal supply resumes. Review Recipe cost and consumption after any factor change.
Bulk-maintain products
On the Product list, the Inventory tracking column's Tracked or Untracked badge means “included in at least one Inventory/Stock Count List.” Open Product detail to see whether stock tracking itself is None, Quantity only, or Lot and expiry.
- 1Filter or search the Product list until the required records are visible.
- 2Select the Products on the current page.
- 3Choose the bulk action to set a Category, remove their Category, or delete them.
- 4Review the selected count and confirm. Use inactive status instead of deletion when stock or transaction history must remain available.
Maintain the product catalogue
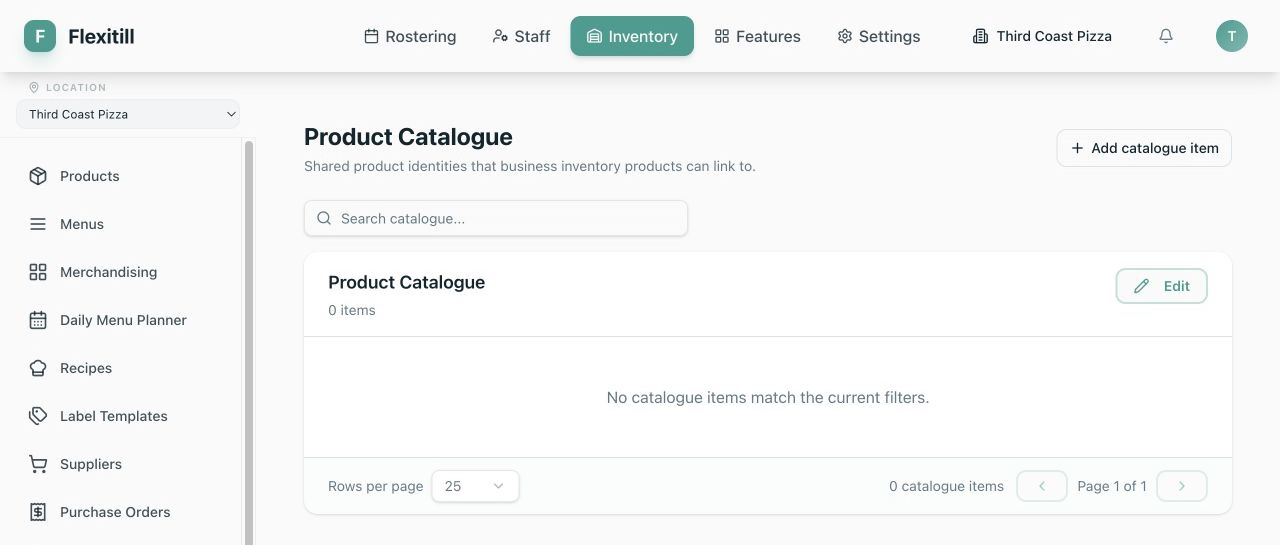
Where to find it·Inventory → Catalogue (direct route when enabled)
Catalogue items are reusable identities that can be linked to operational Products. A Catalogue item does not itself hold location stock.
- 1Open the Product Catalogue and search by identity before adding another entry.
- 2Choose New Catalogue Item and enter name, brand, manufacturer, barcode, base unit, display unit and description as available.
- 3Save, then select the Catalogue identity when creating a Product.
- 4Use the linked Product count before editing or deleting. Deleting the Catalogue item detaches its Products; it does not delete those Products.
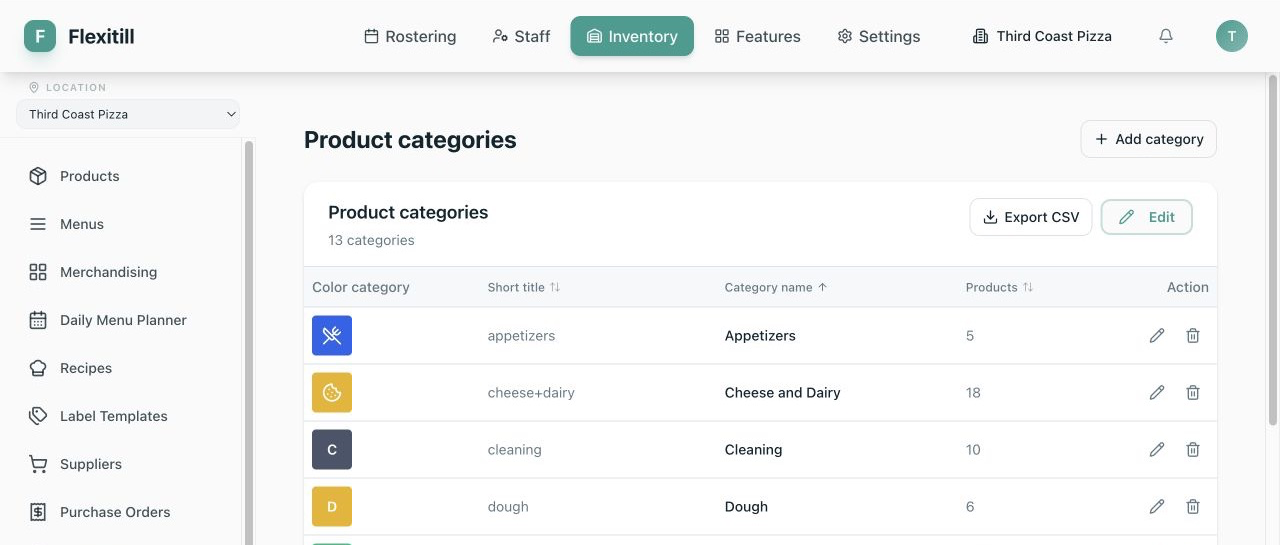
Create and maintain categories
Where to find it·Inventory → Settings → Categories
- 1Search the Category list before creating a new grouping.
- 2Choose Add Category, enter its name and short name, then select the colour and icon used in operational displays.
- 3Save and assign Products to the Category from Product create/edit or the Product list bulk action.
- 4Edit a Category when presentation changes. Review its Product count before deletion and confirm the removal.
- 5Export CSV when a master-data review is required.
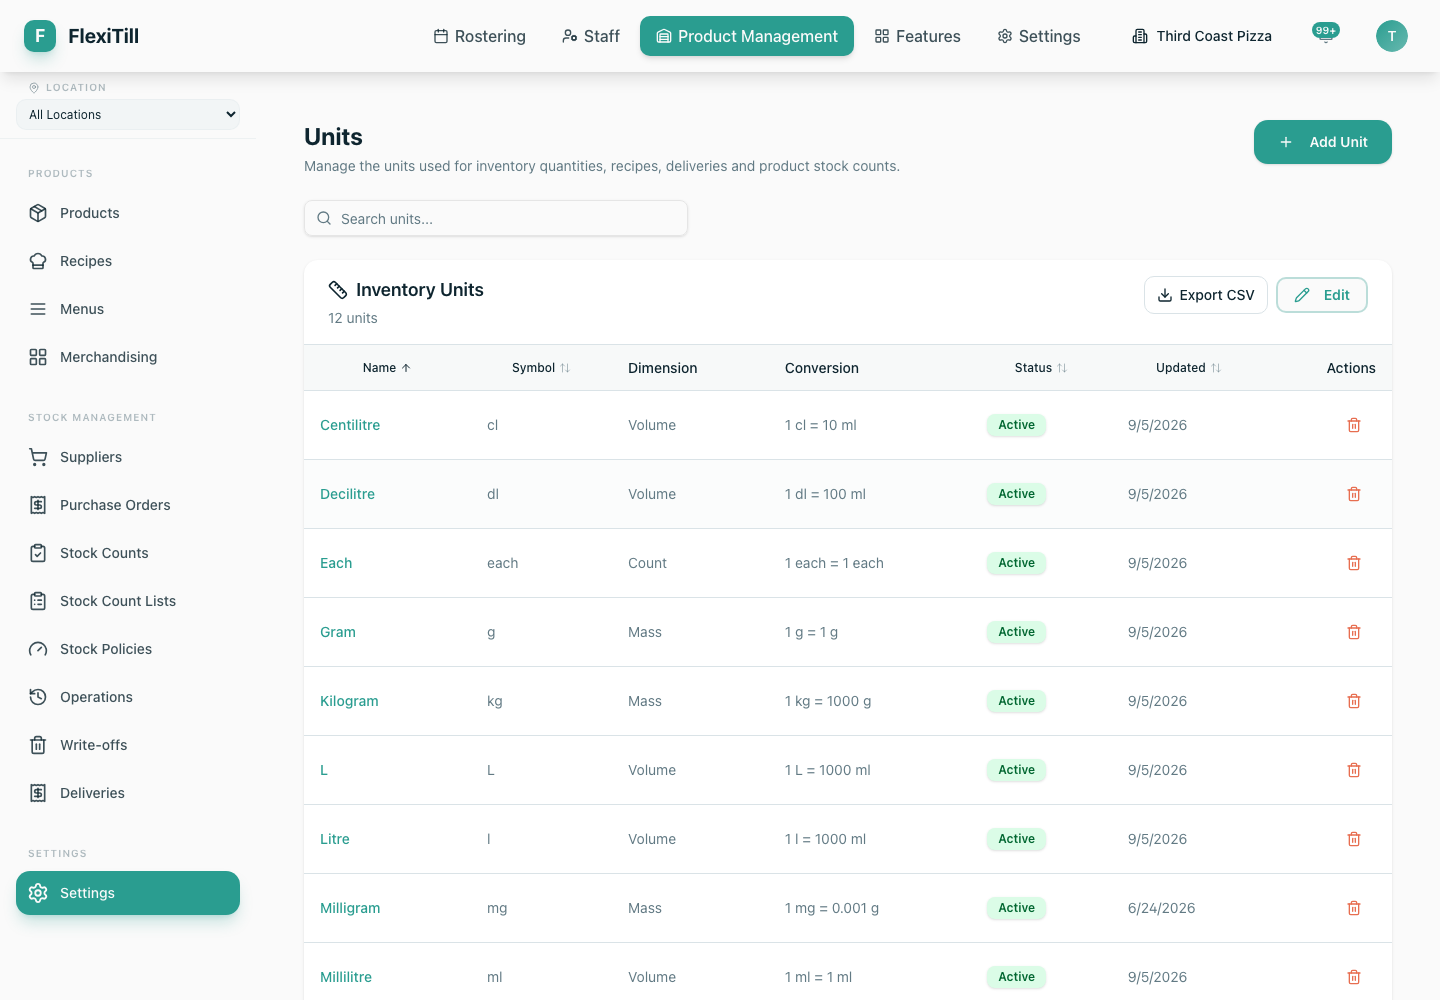
Create and maintain global units
Where to find it·Inventory → Settings → Units
- 1Search by name or symbol before creating a Unit.
- 2Choose Add Unit and enter its name and symbol.
- 3Choose Mass, Volume or Count and define how many canonical base units one unit contains: grams for mass, millilitres for volume or each for count.
- 4Check the conversion preview. Recognised standard symbols fill and lock the dimension and factor to protect shared conversions.
- 5Add an optional description and create the Unit.
- 6Edit or deactivate Units that should no longer be selected. Deleting a Unit removes it from selectors but preserves legacy Product unit text.
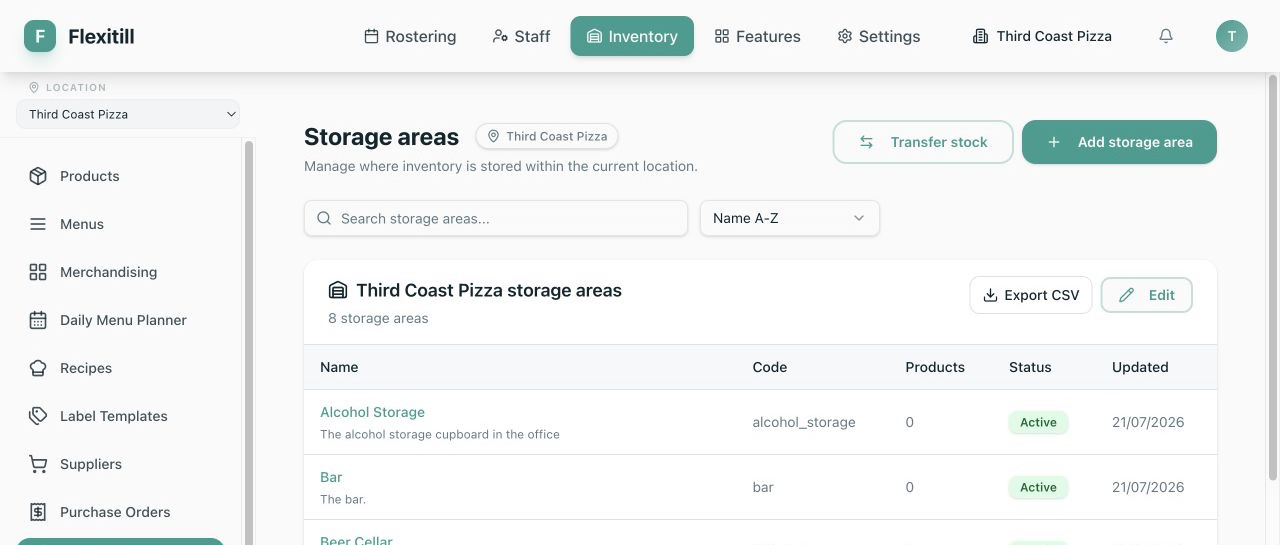
Create a storage area
Where to find it·Inventory → Storage Areas
- 1Select the location. In an all-locations view you can review areas, but creation and transfer require one location.
- 2Choose New Storage Area and enter a unique useful name, optional code and description.
- 3Save, then open the area to edit its details or active status.
- 4Set it as a Product's default area where appropriate and route future Deliveries, PO receipts, Write-offs and counts to it.
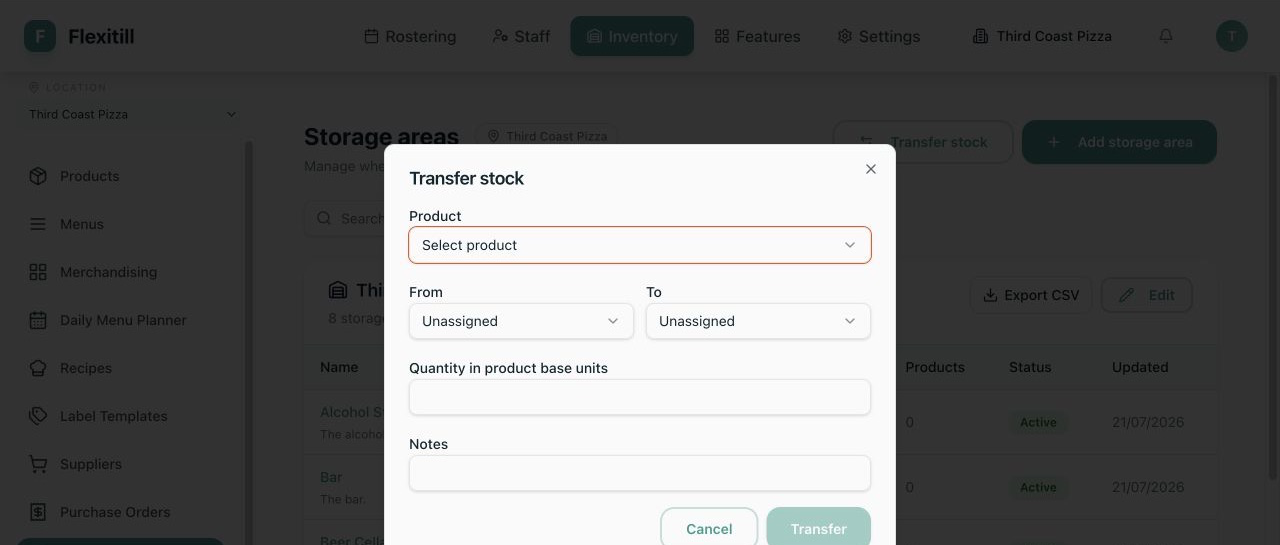
Transfer stock between storage areas
Where to find it·Inventory → Storage Areas → choose an area
- 1Select a single location and choose Transfer Stock.
- 2Choose the source area and destination area. Either side can be Unassigned, but source and destination must be different.
- 3Choose the Product and enter a positive quantity in its base stock unit.
- 4Add notes that explain the physical move, then post the transfer.
- 5Verify the new area balances on Product detail and the movement in Inventory → Operations → Transfers.
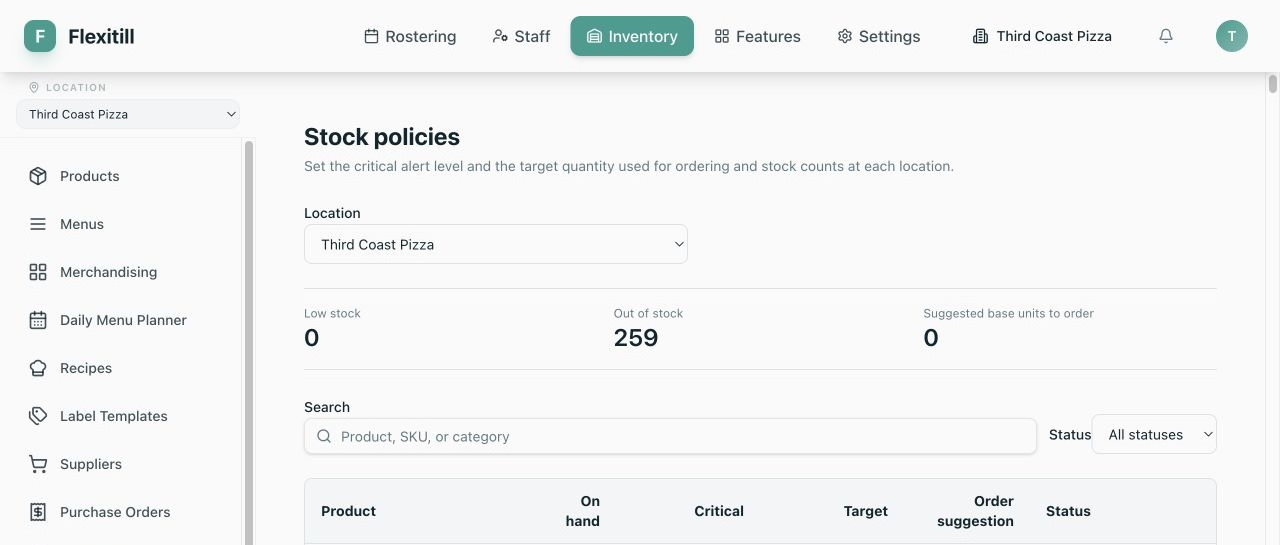
Set stock thresholds and targets
Where to find it·Inventory → Stock Policies
- 1Select the location whose on-hand stock you want to manage.
- 2Search by Product, SKU or Category, or filter to Low, Out or Healthy Products.
- 3Enter the Critical threshold: at or below this quantity the Product needs attention.
- 4Enter the Target quantity: the level you want to restore.
- 5Review the suggested order quantity, which is calculated from target and current stock, then save the row.
- 6Use the summary to review low/out counts and suggested base units before creating Purchase Orders.
Configure business inventory settings
Where to find it·Settings → Inventory
Recipe Variant consumption
- 1Choose Disabled when a base-Product Recipe ingredient must not consume Variant balances automatically.
- 2Choose Use variant stock first when Flexitill should consume matching Variant stock before the base Product. The Variant with the highest available balance is used first; lot-tracked Products still follow their issue policy.
Delivery Receipt controls
- 1Set the correction and backdate window from 0 to 365 days. Posted receipts outside this window cannot be corrected or voided through the normal workflow.
- 2Enable Require a Storage Area to prevent receipts being posted to the location's Unassigned balance.
- 3Save. If Storage Area is now required, make sure Products and Suppliers have usable receiving destinations before the next Delivery.