Build recipes and preparation labels
Define what one batch makes, what it consumes, how kitchen measurements convert to stock, and the instructions, costing and labels staff need.
Understand what a recipe controls
Where to find it·Inventory → Recipes
A production Recipe belongs to one manufactured output Product. The Product is the thing you sell, count or hold in stock; the Recipe is how one batch is made. A Product can have only one production Recipe.
Output Product
Owns the name, SKU, Category, description, image, production method, shelf life and stock identity.
Recipe
Owns the batch yield, preparation and cooking time, step-by-step instructions, Ingredient lines, availability, costing history and prep-label choice.
Made to order
Use when selling the finished item should consume its Recipe Ingredients as part of the sale.
Prepared stock
Use when staff make batches into stock first, then count or sell the produced quantity later.
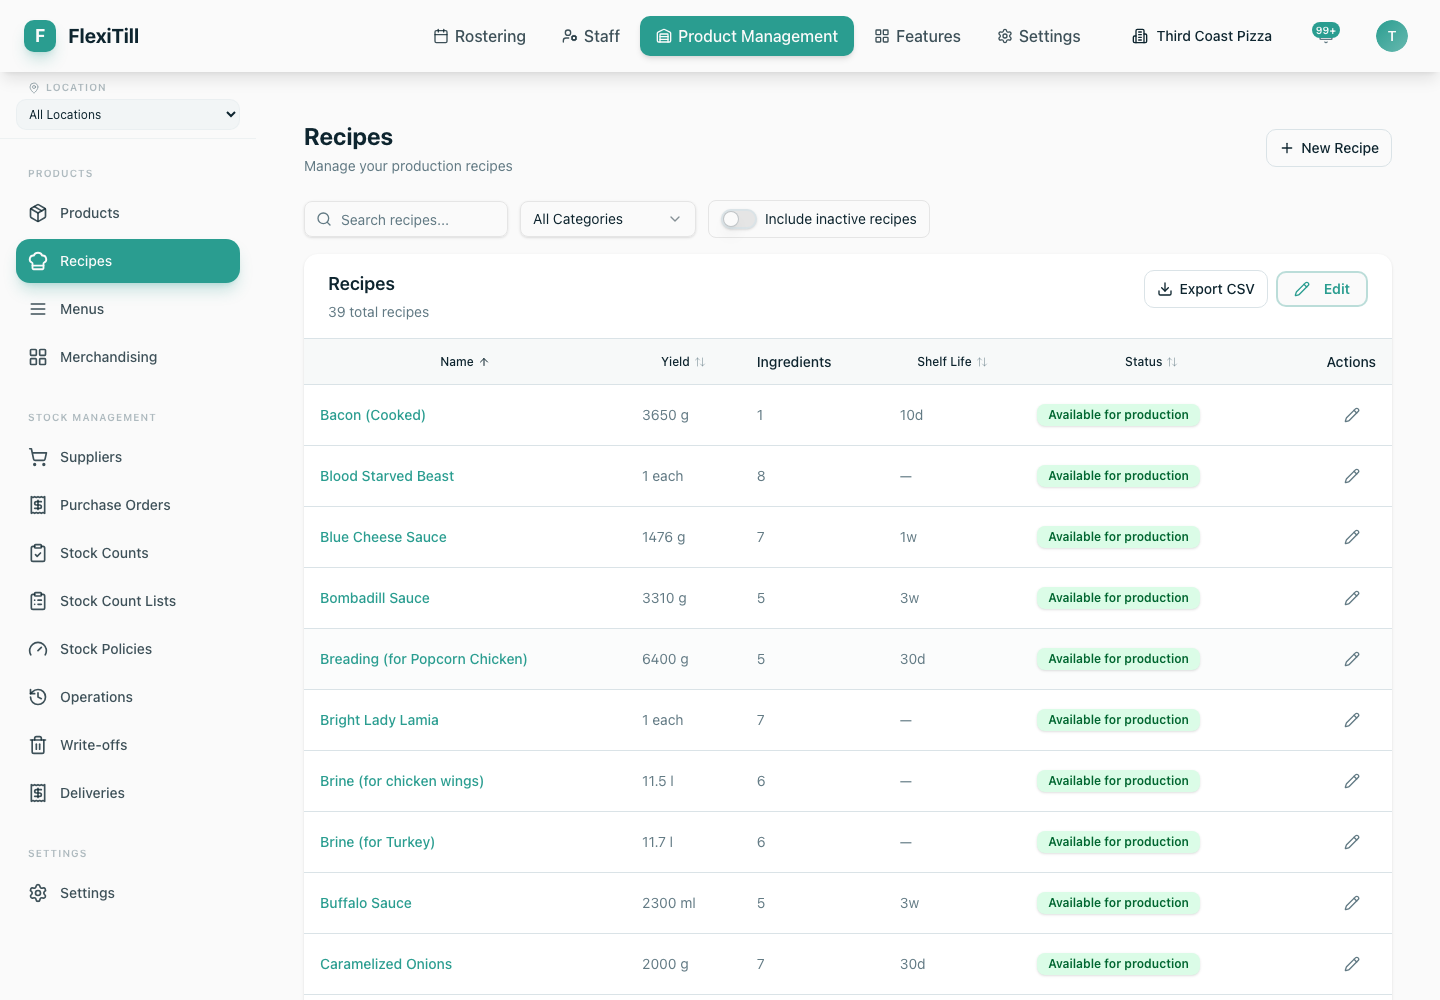
Find and review recipes
- 1Search by Recipe or output Product name.
- 2Filter by Product Category, including Uncategorised, and switch on Include inactive recipes when reviewing retired work.
- 3Sort the list by name, yield, shelf life or status. Ingredients shows how many lines the Recipe contains.
- 4Use Edit on the list card to choose which columns are visible. This preference is saved in the browser.
- 5Use Export CSV when you have permission and need the current Recipe register outside Flexitill.
- 6Open a Recipe. Production Recipes are managed on the output Product's Production tab.
Create a recipe and a new manufactured product
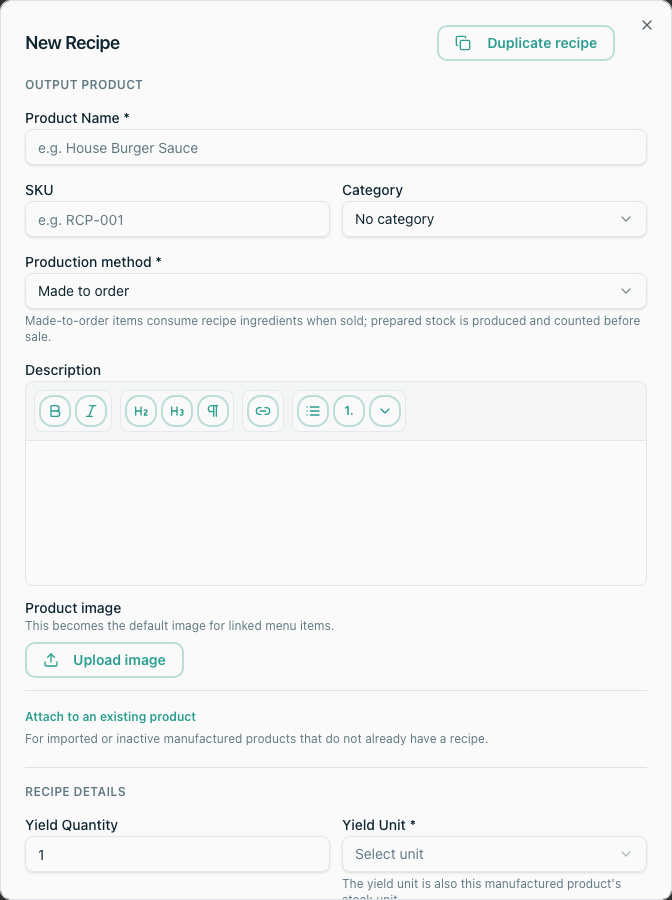
- 1Choose New Recipe and leave Create a new output product selected.
- 2Enter a unique Product name and optional SKU, then choose a Category.
- 3Choose Made to order or Prepared stock according to when ingredient stock should be consumed.
- 4Add the finished Product's description and image. Put preparation instructions in the Recipe section instead of duplicating them in the Product description.
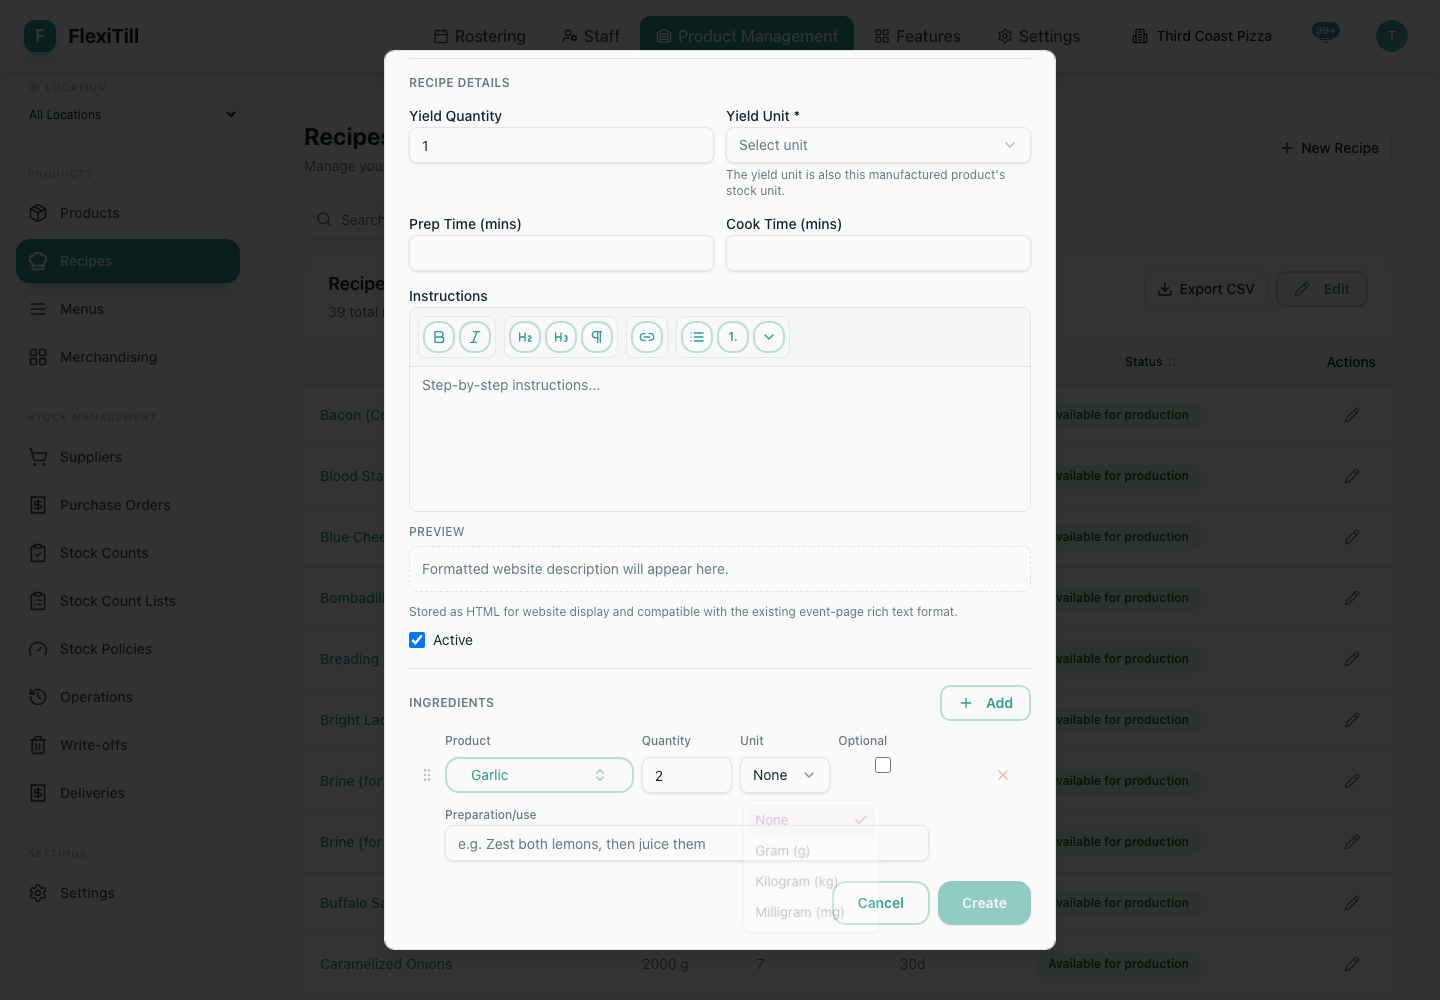
- 5Enter a positive Yield Quantity and choose a Yield Unit. This is the amount made by one complete batch.
- 6Enter preparation and cooking time in minutes, then add the step-by-step instructions. Rich instructions can include supported images, video and internal links.
- 7Leave Active selected only when the Recipe is complete and ready for operational use.
- 8Add all Ingredient lines, review the conversions and create the Recipe.
Attach a recipe to an existing product
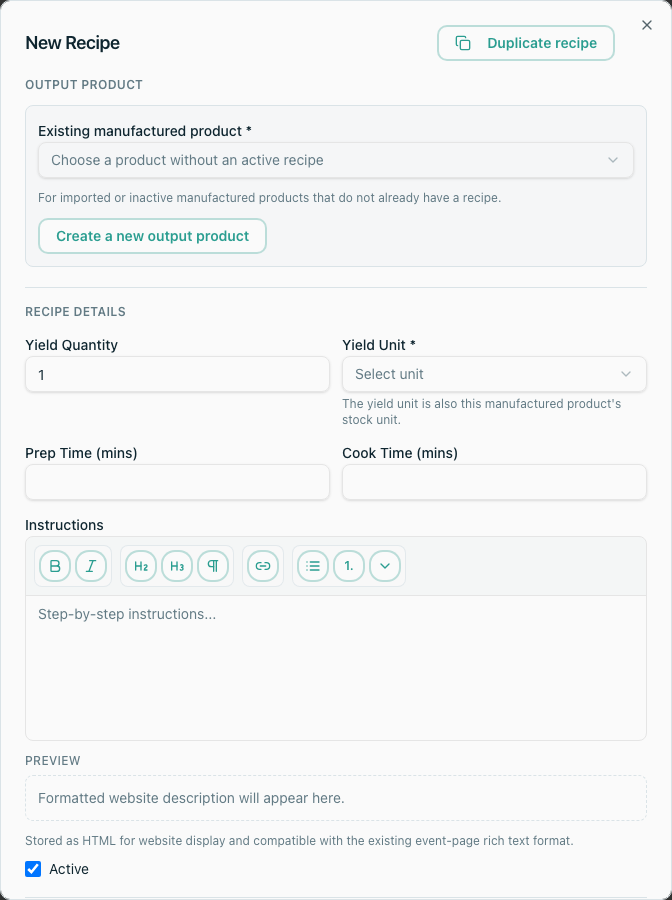
Use this for an imported, inactive or previously created manufactured Product. Purchased Products and Products that already have a Recipe are not eligible.
- 1Choose New Recipe, select Attach to an existing product, then choose the manufactured Product.
- 2Check the Product's production method, description, image, Category, tracking and current base stock unit on Product detail.
- 3Set the Recipe yield. When the Product's base unit is an active global Unit, it is offered as the starting Yield Unit.
- 4Add times, instructions and Ingredient lines, choose whether the Recipe is Active, then create it.
- 5Open the output Product and review its Production tab to verify the Recipe relationship.
Duplicate a recipe safely
Duplicate is useful for a closely related manufactured item, such as a new sauce flavour or a second board size. It is not a second Recipe for the same output Product.
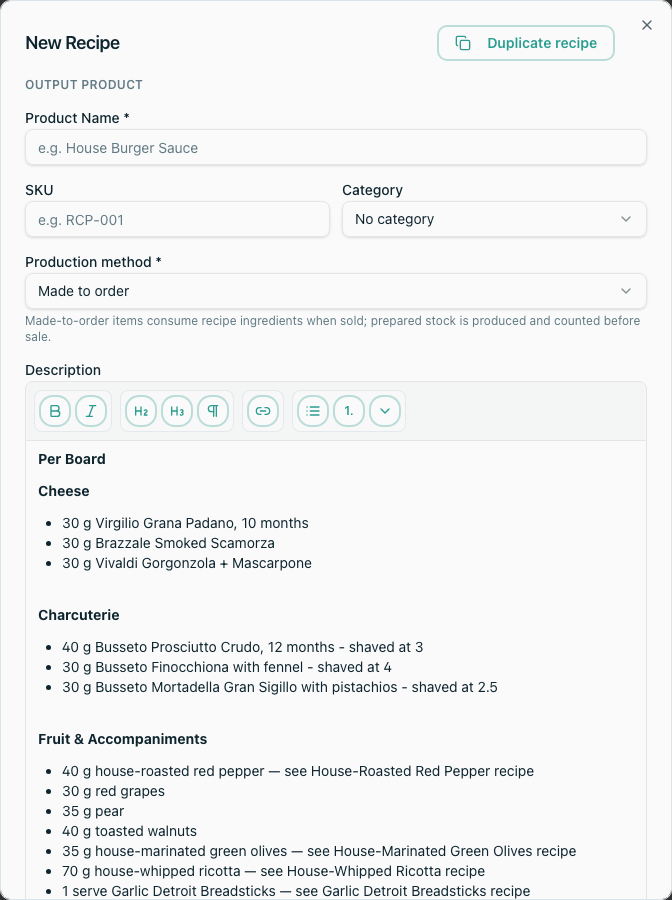
- 1Choose New Recipe, then Duplicate recipe.
- 2Choose the source Recipe and select Prefill form.
- 3Flexitill copies the Category, image, production method, Product description, yield, times, instructions, active state and Ingredient lines.
- 4Enter a new, unique output Product name and SKU. These are deliberately not copied.
- 5Review every Ingredient quantity, Unit, optional flag and preparation note. Change the yield when the new item produces a different amount.
- 6Create the new Product and Recipe, then review their cost and status independently.
Build the ingredient list
- 1Choose Add and select the purchased or manufactured Product consumed by one batch.
- 2If the Product does not exist, use Add new product in the Product picker to create a purchased ingredient without leaving the Recipe.
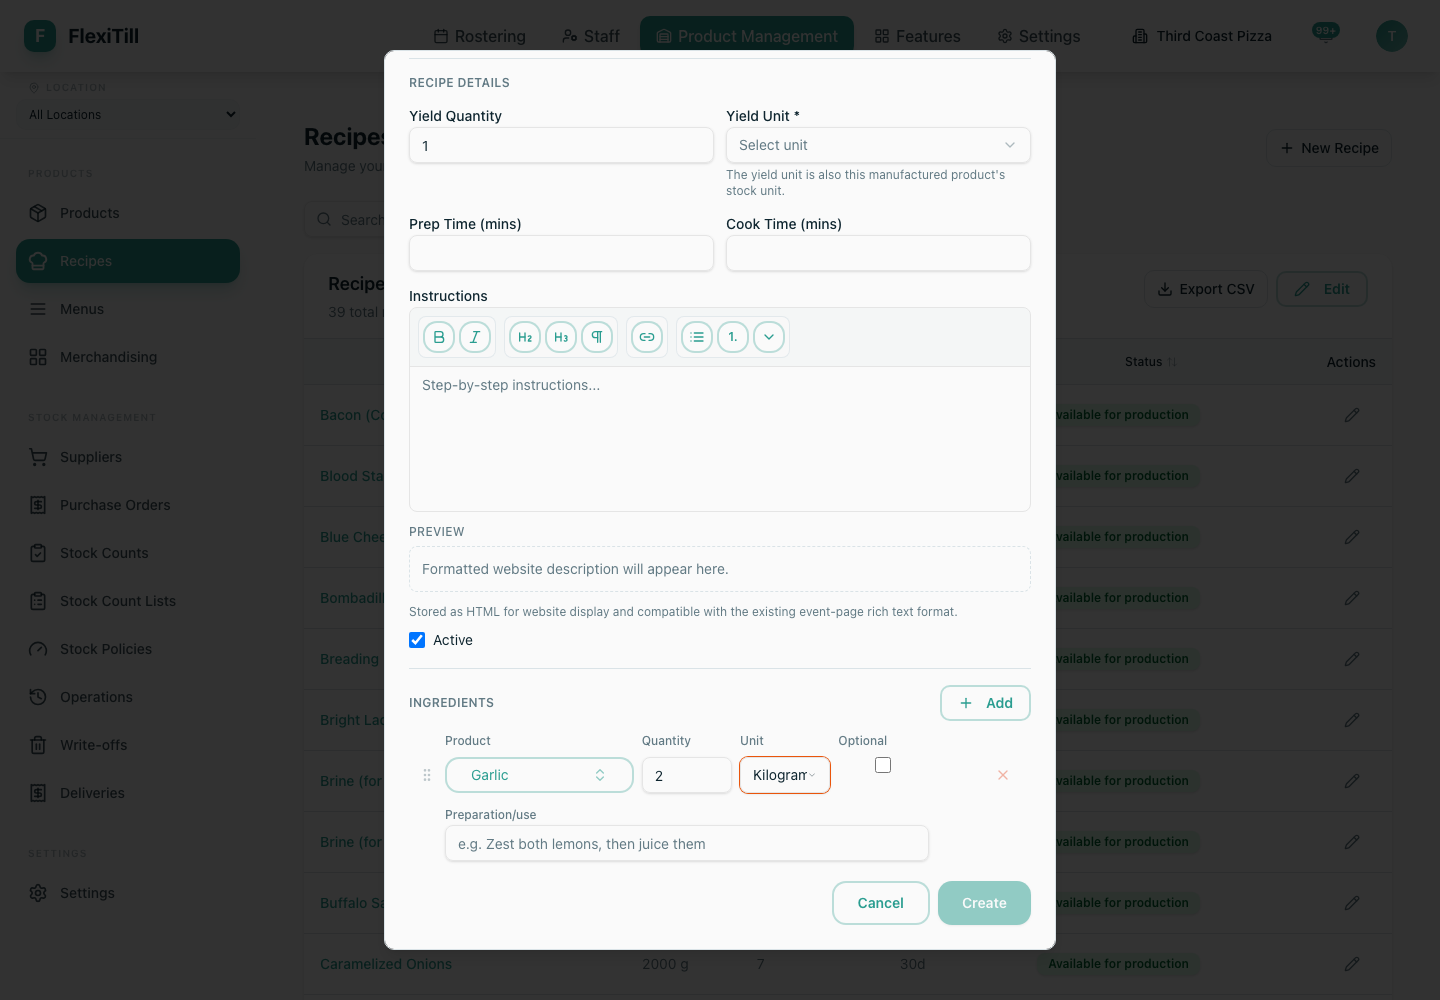
- 3Enter a positive Quantity and choose the Unit used by the kitchen. The available choices depend on the Product's base unit, density and Product pack units.
- 4Select Optional only when production may legitimately omit that line. Optional describes the Recipe instruction; it does not create a substitute Product.
- 5Open the row's Preparation/use disclosure and add a note such as drained, chopped, softened or zest then juice. The disclosure keeps long Recipe lists compact.
- 6Add the remaining lines, then drag the handle or use the focused handle's arrow keys to put them in working order.
Choose the right kind of unit
Flexitill keeps the practical Unit on the Recipe but converts the quantity to each Ingredient Product's base stock unit for stock and costing. Three similar-looking settings have different jobs.
Global Unit
A reusable measurement such as g, kg, ml, l, tsp, tbsp or each. Use it when the same mathematical conversion applies to every Product.
Product pack unit
A named container or handling unit such as 170 g jar, 400 g tin or case of 24. It belongs to one Product and describes its measured contents.
Supplier Product
A supplier-specific item you purchase, including supplier code, terms, pack cost and purchase-to-stock conversion. Recipe lines select the Product, not the Supplier Product.
Base stock unit
The Product's ledger unit: each, g or ml. Every Recipe quantity is resolved to this unit before it affects cost or stock.
Manage global units and conversions
Where to find it·Inventory → Settings → Units
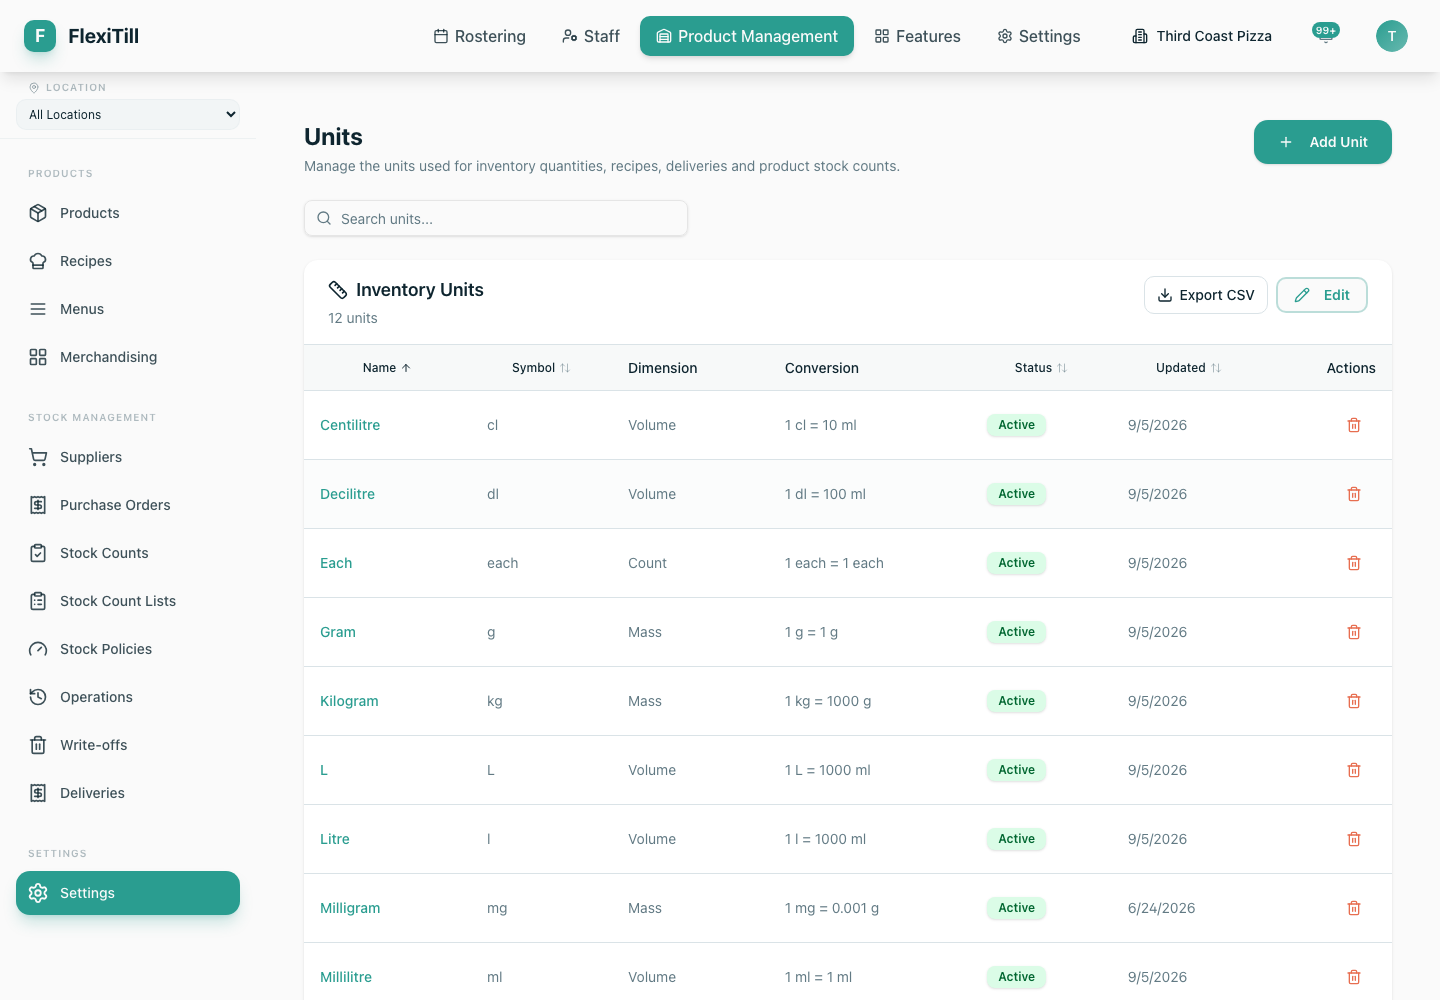
Global Units share one canonical conversion model: Mass converts to grams, Volume to millilitres, and Count to each. The conversion factor is the number of canonical units represented by one of the new Unit.
- 1Search the Unit list first. Do not create a second symbol for an existing measurement.
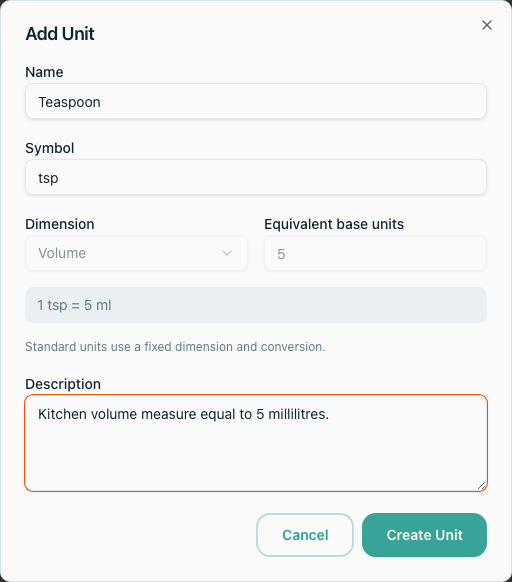
- 2Choose Add Unit and enter a clear Name and unique Symbol.
- 3Choose Mass, Volume or Count, then enter the positive Equivalent base units. For example, 1 scoop containing 60 ml uses Volume and 60.
- 4Check the preview, add a description that explains the operational meaning, then create the Unit.
- 5For recognised symbols such as mg, g, kg, ml, tsp, tbsp, cl, dl, l and each, Flexitill fills and locks the standard dimension and factor.
- 6Open a Unit name to change its display name, description or active status. Semantic changes to a symbol, dimension, factor or active state are blocked when the Unit is a Product base unit or Recipe yield.
- 7Delete only an unused Unit. Reassign old Recipe Ingredient lines before removal so future cost calculations do not lose their conversion definition.
Use a Product pack unit in a recipe
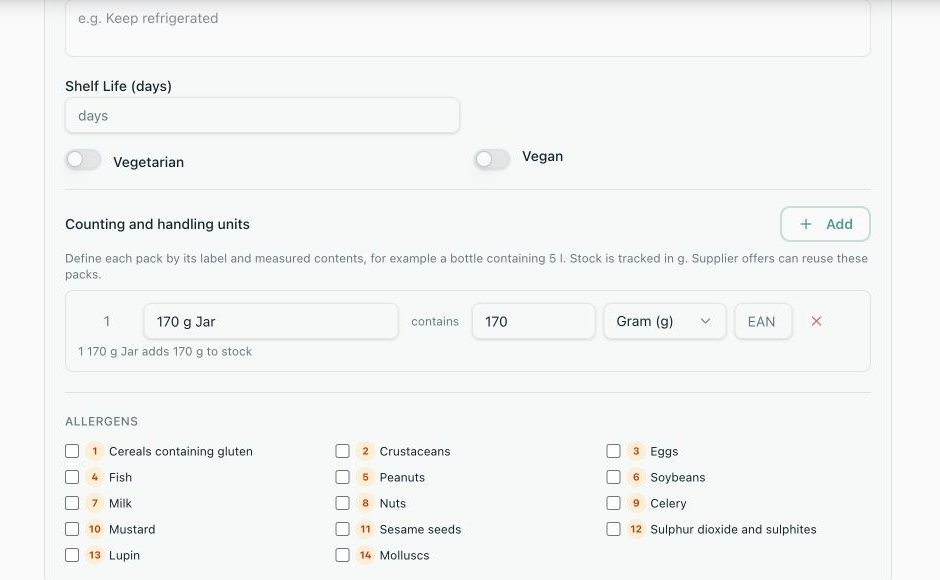
Create a Product pack when staff repeatedly measure this particular Product by container. This is more reliable than inventing a global Unit named “tin”, because tins can contain different amounts.
- 1Open the Ingredient Product and choose Edit.
- 2Under Counting and handling units, add the label staff recognise, such as 400 g tin or case of 24.
- 3Choose the measured contents Unit and enter the contents of one pack. Flexitill previews the conversion to the Product's base stock unit.
- 4Optionally add an EAN and restrict the pack to one independently counted Product Variant.
- 5Save the Product, return to the Recipe and reselect or refresh the Ingredient Product.
- 6Open the Ingredient Unit list. Product-specific choices appear under Pack units; choose the pack and enter the number used by one batch.
Worked conversion examples
Flour: kg to g
Flour is stocked in g. A Recipe line of 2 kg resolves through the global kg factor and consumes/costs 2,000 g.
Oil: tablespoon to ml
Oil is stocked in ml. A Recipe line of 3 tbsp uses the standard 15 ml factor and resolves to 45 ml.
Tomatoes: tins to g
Tomatoes are stocked in g. A Product pack named 400 g tin contains 400 g, so 2 tins resolve to 800 g.
Napkins: case to each
Napkins are stocked as each. A Product pack named case of 24 contains 24 each, so half a case resolves to 12 each when fractional cases are operationally meaningful.
Sauce: ml to g using density
Sauce is stocked in g with density 1.1 g/ml. A Recipe line of 100 ml resolves to 110 g.
Supplier case versus Recipe tin
You may buy 6 × 400 g tins as one Supplier Product case, then use the reusable 400 g tin Product pack in the Recipe. Purchasing adds 2,400 g; a Recipe using 2 tins consumes 800 g.
Convert between mass and volume with density
Mass Units convert directly to other Mass Units, and Volume to other Volume Units. Crossing from grams to millilitres, or the other way round, requires a positive Product density in grams per millilitre.
- 1Open the Ingredient Product and choose Edit.
- 2Confirm whether its base stock unit is g or ml.
- 3Enter Density (g/ml) from a controlled measurement or specification, then save.
- 4Return to the Recipe. Compatible Units from the opposite Mass/Volume dimension are now offered.
- 5Test a small known conversion and confirm the resulting Recipe cost before relying on the density operationally.
Use variants and substitutions with recipes
Variant stock consumption
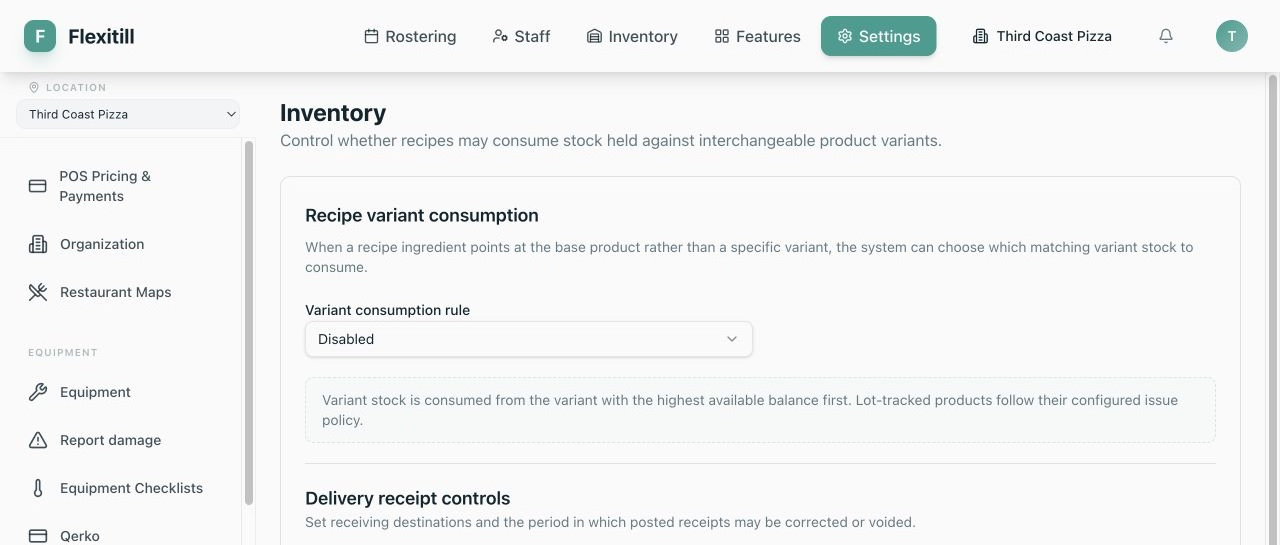
Where to find it·Settings → Inventory → Recipe Variant consumption
Current Recipe editing selects the base Ingredient Product. When Recipe Variant consumption is Disabled, the base Product balance is used. When Use variant stock first is enabled, a base-Product line can consume the eligible Variant with the highest available balance first. Lot-tracked stock still follows its configured issue policy.
Product substitutions
Configure an approved substitute on Product detail when another Product can stand in for the Ingredient. Keep one Ingredient line for the intended Product; do not add both Products as duplicate required lines. In-force substitutions can affect downstream consumption and cost resolution.
Save, activate and validate a recipe
- 1Check the output Product, production method, yield quantity and Yield Unit.
- 2Review every Ingredient quantity, Unit, optional flag, note and row order.
- 3Resolve duplicate Product warnings and any Unit that cannot convert to the Ingredient's base stock unit.
- 4Create or save the Recipe. Names must be unique and the output must be a manufactured Product with no other production Recipe.
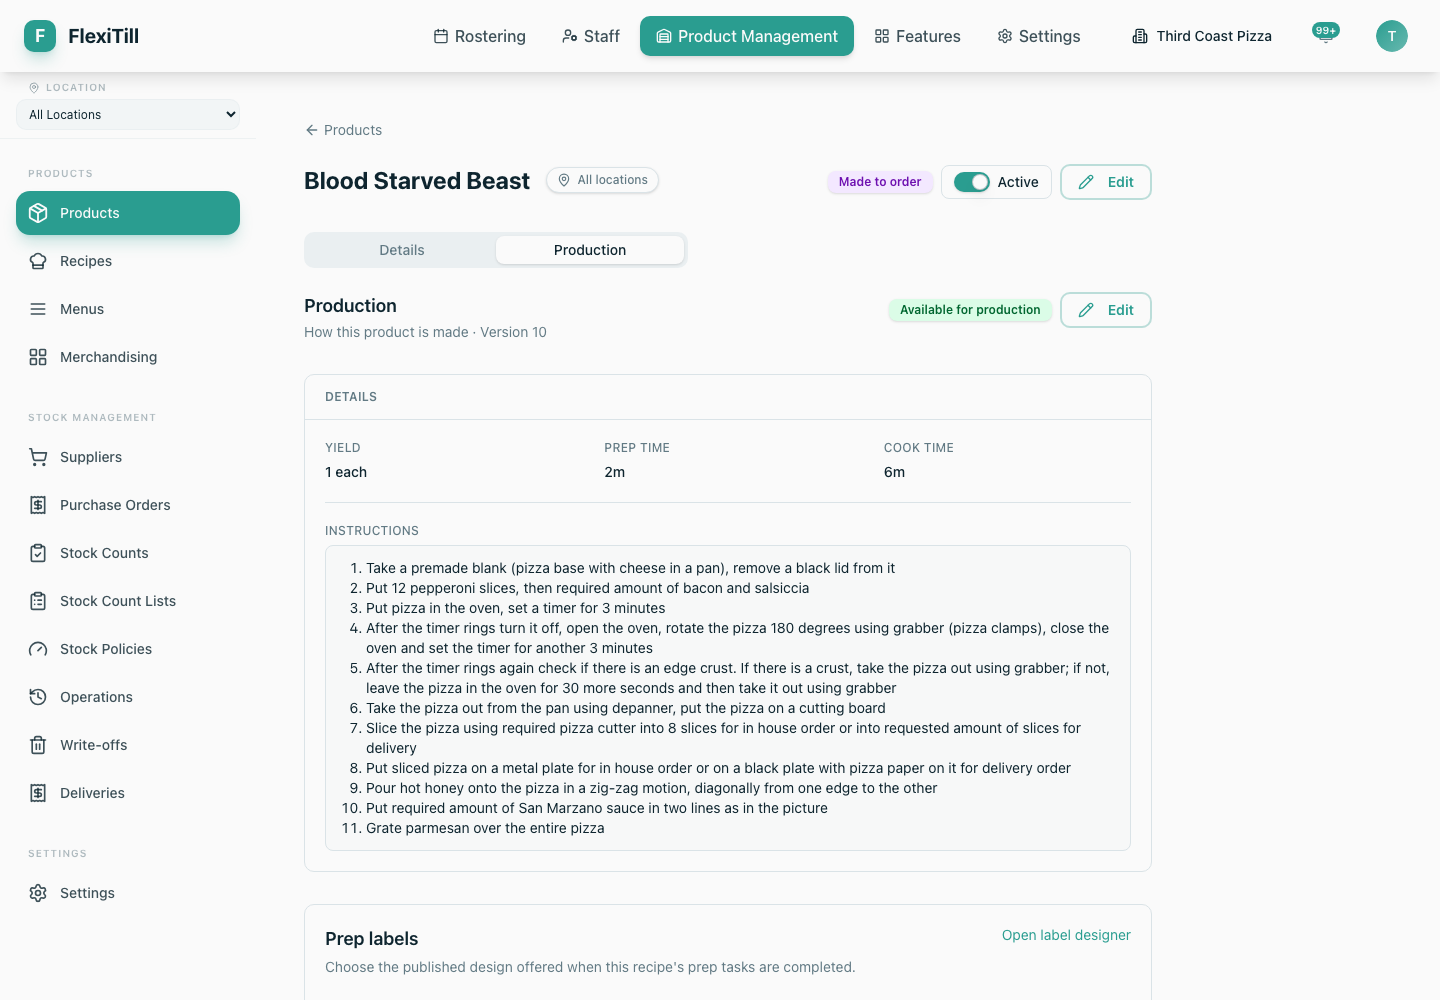
- 5Open the output Product's Production tab and check the availability badge, version, instructions and Ingredient table.
- 6For a Prepared stock Product, make sure the operational production workflow is enabled before staff rely on the Product's on-hand balance.
Edit a recipe without reinterpreting stock
- 1Open the output Product's Production tab and choose Edit beside Production.
- 2Update the yield, times, instructions, availability or Ingredient lines. You can add, remove, reorder and quick-create Ingredient Products in edit mode.
- 3When editing outside the embedded Product view, changing the Recipe name also renames the output Product.
- 4If you change the Yield Unit, review the warning: the output Product's base stock unit must change with it.
- 5Save only when Flexitill confirms the stock-unit change is safe. Existing stock, other Recipe use, Menu use or transaction history can block a change that would reinterpret historic quantities.
- 6When blocked, keep the existing Unit or use Create replacement product to copy the Recipe into a new manufactured Product with the intended Unit.
Review recipe cost
See Product costs and costing choicesfor ingredient cost sources, moving averages, standard costs, and why a prepared batch's recorded cost can differ from today's Recipe estimate.
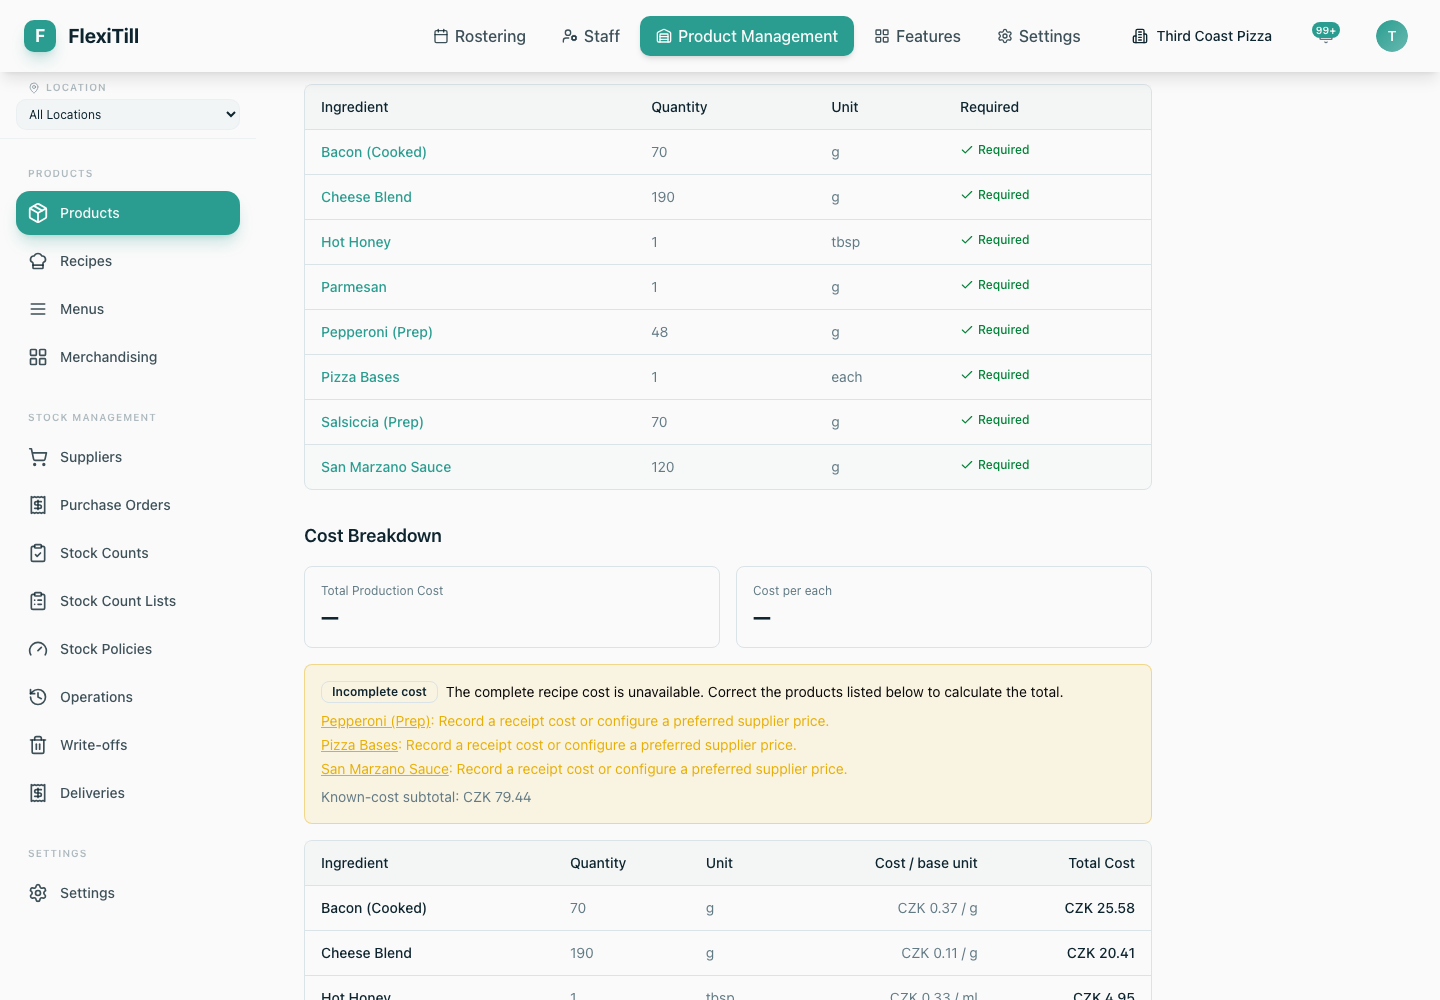
Cost is calculated for the whole batch and per Yield Unit. Every Ingredient quantity is first converted to that Product's base unit, then multiplied by its current cost per base unit.
- 1Open the Production tab and scroll to Cost Breakdown.
- 2Review Total Production Cost and Cost per Yield Unit.
- 3Check the Ingredient breakdown for the practical Recipe quantity and Unit, cost per base stock unit and line total.
- 4If cost is Incomplete, use the listed Product links to correct a missing base Unit, invalid conversion or missing cost basis.
- 5For automatic costing, maintain receipt cost or a preferred active Supplier Product. The preferred Supplier Product is the list-price fallback; the Recipe does not choose a supplier itself.
- 6Treat Known-cost subtotal as partial information only. Do not use it as the final batch cost until every issue is resolved.
Review versions and retire a recipe
- 1Use the disclosure beside an Ingredient name when you need to read its preparation/use note, then open History to see the version, action, actor and time for each change.
- 2Expand an entry to review changed fields and Ingredient lines that were added, removed or updated, including quantity, Unit, optional status and notes.
- 3Turn Available for production off when a Recipe must remain in audit history but should no longer be used.
- 4Create a replacement output Product when a historical Product must keep its existing stock unit or identity.
- 5Production Recipes attached to Products are normally retired, not deleted. A delete action is shown only for eligible legacy or unlinked Recipes, and protected operational use can still prevent deletion.
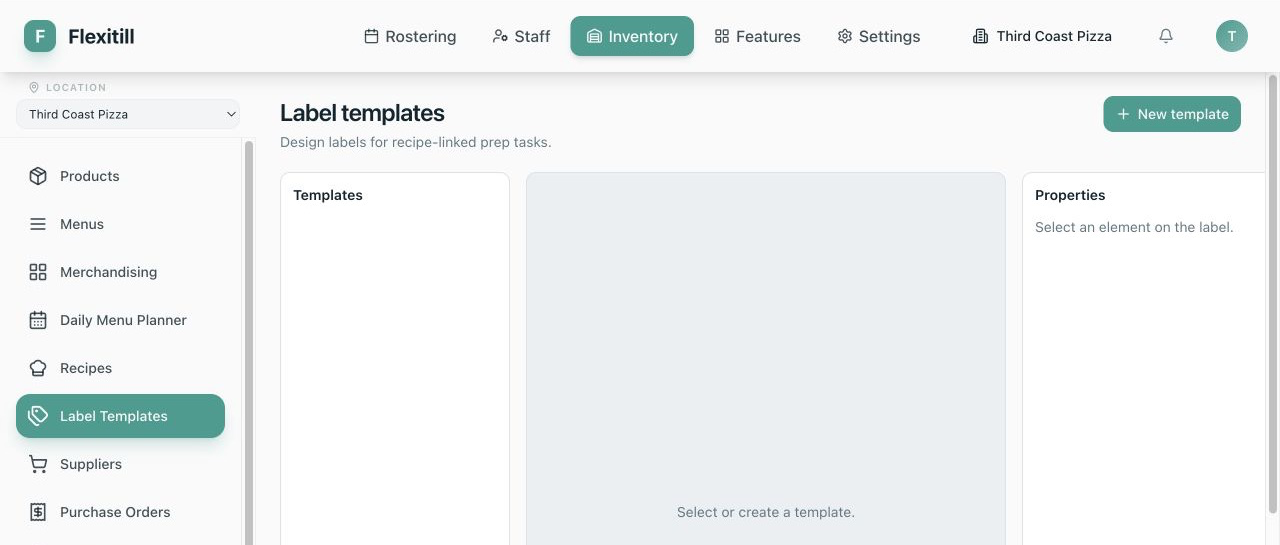
Create a preparation label template
Where to find it·Inventory → Settings → Label Templates
- 1Choose New Label Template and enter a clear name plus the physical width and height in millimetres.
- 2Create the template. Flexitill opens its draft in the designer.
- 3Confirm the size matches the printer media before positioning fields; changing physical size later can move content outside the printable area.
Design and publish a label
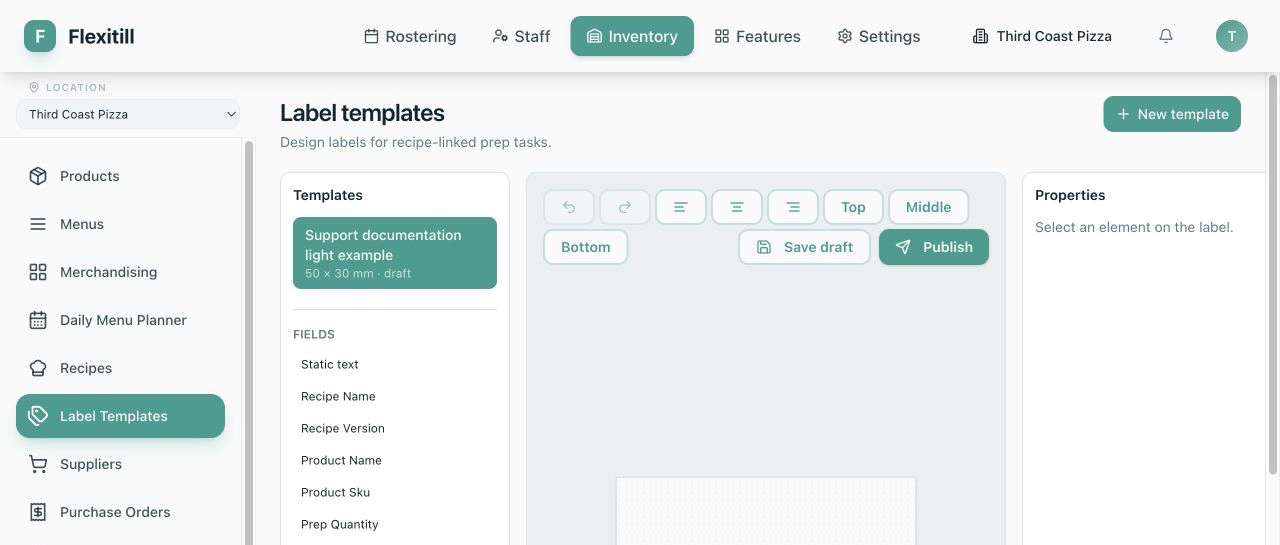
- 1Add dynamic fields for Recipe or preparation data and static text for fixed wording.
- 2Place, move and resize elements on the grid. Use x, y, width and height for exact positioning.
- 3Set static text, font size and bold style. Select multiple elements to align them left, centre, right, top, middle or bottom.
- 4Duplicate repeated elements or delete incorrect ones. Use Undo and Redo while refining the layout.
- 5Save Draft and check the whole label at its stated millimetre dimensions.
- 6Choose Publish only when the version is ready for operational use. Later edits remain a draft until you publish again.
Apply a preparation label to a recipe
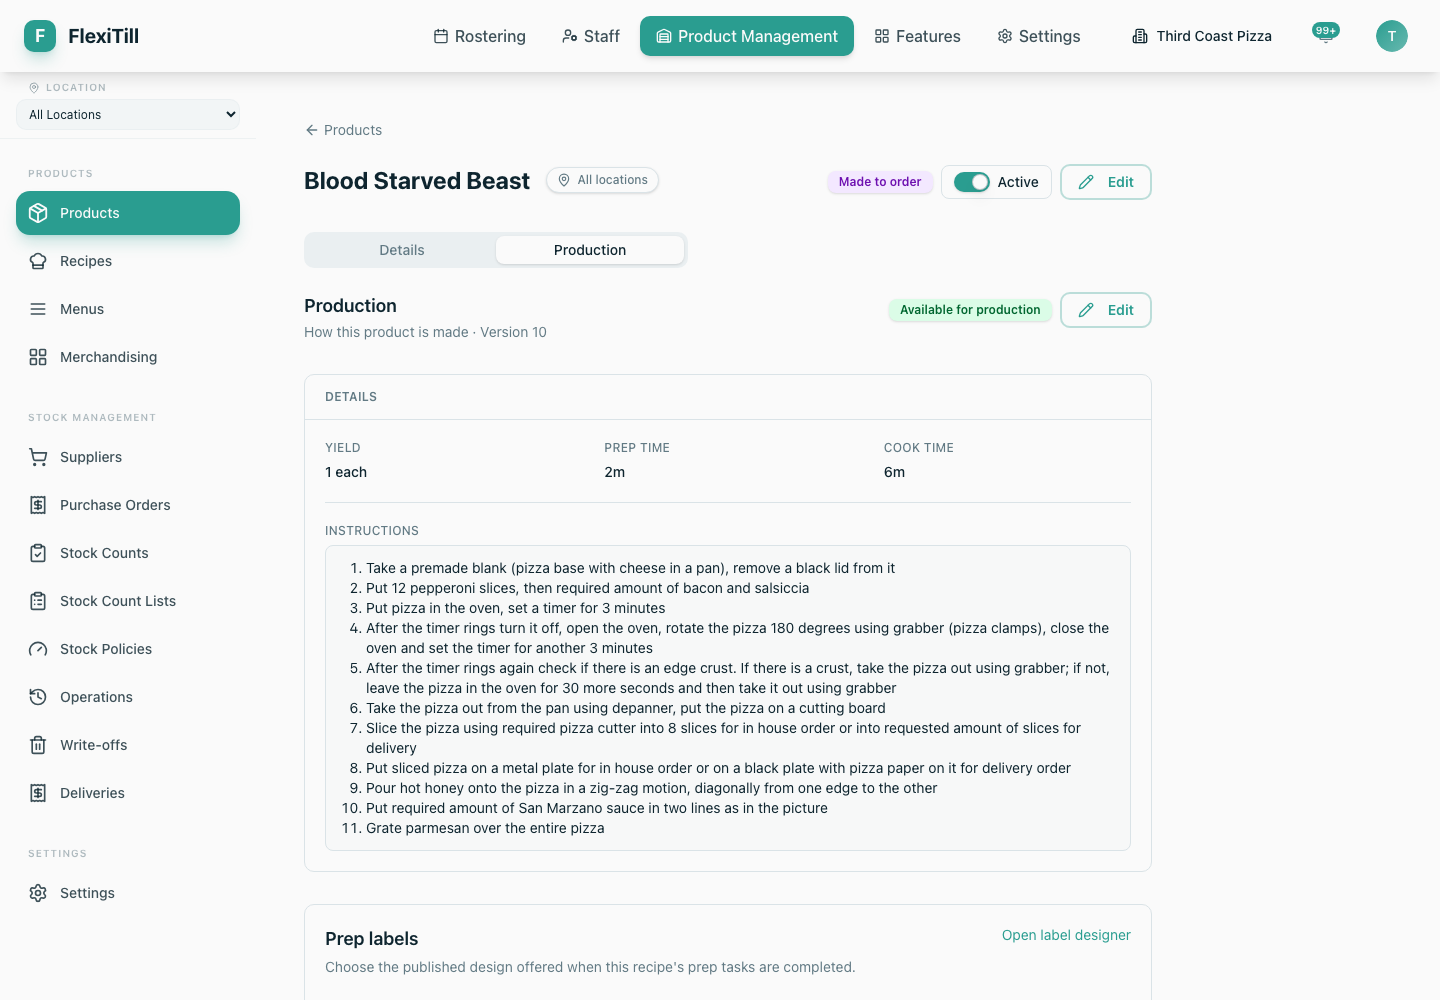
- 1Open the output Product's Production tab and find Prep labels.
- 2Choose an active Label Template that has a published version. Draft-only templates are not offered.
- 3Set Default copies from 1 to 100 and choose whether Print by default should be selected when a linked prep task is completed.
- 4Save the label configuration, or choose No label and save to remove an existing configuration.
- 5Test a preparation print with representative Product, quantity and date values. Repeat the test whenever the template is republished.
If an action is missing
Recipe visibility and costing depend on Recipe, Product and sometimes Finance permissions. Creating, editing and deleting require the corresponding Recipe or Product permission. Label settings also require access to Label Templates. Ask an administrator to check your role and enabled Inventory features if a page or action is absent.